InstatDesk - CZ
In order to collect data for Intrastat, the Ministry of Finance - General Directorate of Customs Administration in cooperation with the Czech Statistical Office developed a program called InstatDesk-CZ.
Data to be transmitted (collected) can be entered either manually or imported to InstatDesk-CZ application from other programs or systems but this import file has to be in compliance with the format specified by the Customs Administration. It is a CSV (Comma Separated Values) file and it is published on the website of the Czech Customs Administration.
InstatDesk-CZ includes functionality for verifying the validity of data on the input and then checking the data sent to the server. It is very important to pay attention to the process of sending data and then verifying if the data are accepted. There is a wide range of auxiliary functions that can facilitate reporting and are described in the manual.
For providing support for the installation and other technical questions about using the application the General Customs Directorate established the Helpdesk for Intrastat based in Olomouc, which is available on working days from 7.00 to 15.30 at the tel. number 261 331 997 and at the time of data collection except of working hours at the tel. number 725 101 542. Questions can also be sent to email intrastat@cs.mfcr.cz. An actual information on technical issues can be found here customs administration website (hereinafter CAW) in the main menu "Other competencies" and submenu "Intrastat". Questions regarding the methodology can be directed to the site of the Czech Statistical Office.
Although the program has been tested the Czech Statistical Office and the General Directorate of Customs have no responsibility for the program and subsequent problems and exclude liability for any damages. If you have any problems during installation or if there are errors contact the Intrastat Helpdesk.
The aim of this documentation is helping you install and use the program InstatDesk-CZ.
1. Requirements for reporting and installation
1.1 System Requirements
You need a computer with the operating system Microsoft Windows, currently it is at least version 7 or higher and installed .NET Framework version 3.5 with a Service Pack 1 (SP1). The program is installed on the hard disk. The basic version of the program InstatDesk-CZ requires 50 MB of a free disk space. This value is changing depending on the volume of processed and stored data. Screen resolution must be at least 1024 x 768 pixels. The computer should have an active Internet connection, without connection to Internet it can only be used to a limited extent.
Notice: The application is compatible only with normal-sized text display (96 dpi / 100%). If you are using a different text display size, the application does not display the data correctly! Some text or GUI components may not be displayed in their entirety.
1.2 Registration at the customs office
After meeting the legal conditions for reporting Intrastat it is necessary to register at the respective Customs Office(for foreign persons registered to VAT at the Tax Office for Prague 1 it is Customs Office for Capital City Prague , Praha Hostiva?, K Hru?ovu 2/293, Praha 10 (e-mail: intra510000@cs.mfcr.cz or podatelna510000@cs.mfcr.cz). This is done by using registration form, which is located at CAW in the section "Documents and informations for Intrastat respondents" From a technical point of view it is the authorization of the username (email address) for the reporting of Intrastat declarations for the given VAT number. (You are registered in our Intrastat users DB.) After authorizing your email address you can retrieve your password by using the CAW to obtain a new or renew a forgotten password here. Authorized e-mail address and password are essential for sending data.
2. Installation of the program
2.1 Requirements
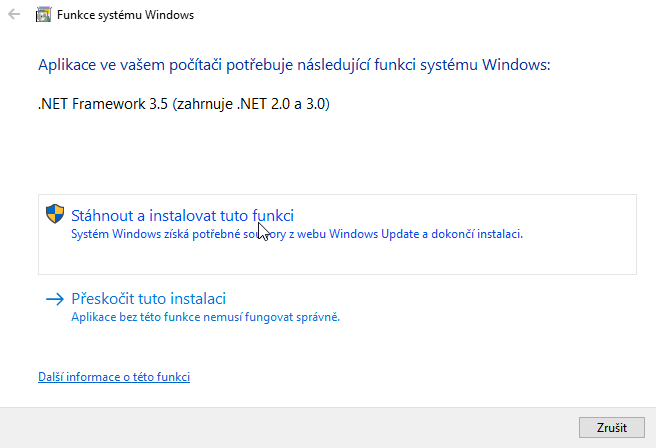
An installation of the .NET Framework version 3.5 with a SP1 is essential. The package can be downloaded from the Microsoft website here. We recommend that you do the installation before installing InstatDesk. The installation package of InstatDesk detects an absence of these components and offers downloading during the installation but this can be problematic sometimes. The Windows Update service must be running. You can find the installation package on the CAW here. It is a compressed ZIP archive file that contains two files setup.exe and Ides.Win.Setup.msi. Before starting the installation it is recommended to decompress the archive files to any work folder so that the files are available for the installer. The installation is started by running the file setup.exe. In case you have not installed .Net Framework 3.5 the installation process offers downloading the framework.
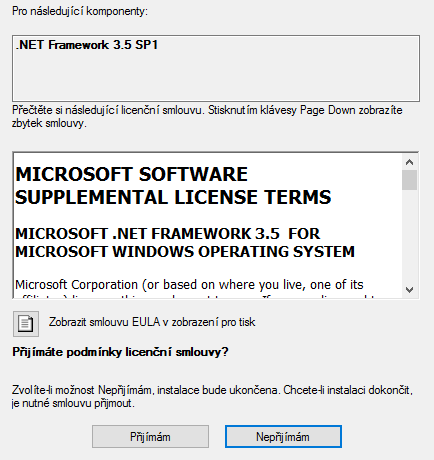
After confirming the license agreement the downloading will begin.
2.2 Installation progress
After starting the installation window of the installation wizard appears that guides you through the installation. Read the information displayed and click "Next >" (Dal�� >).
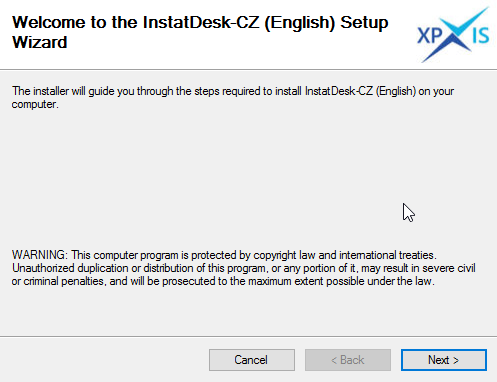
The installation wizard window
To continue the installation process you must agree to the license agreement. Check the "I agree" and click "Next>".
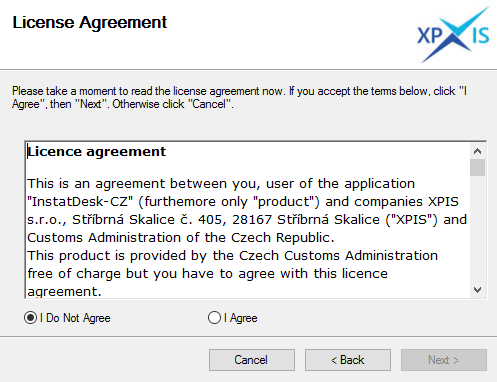
License agreement
At the next step enter the fields "Name" and "Organization". These fields should be filled out. To continue, click "Next >".
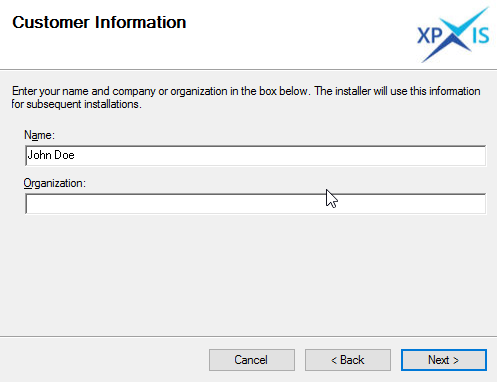
Customer information
At the next step select a directory where the InstatDesk-CZ is installed and also select whether the program is installed under your account or is available to anyone who uses the computer on which InstatDesk-CZ is installed. We strongly recommend to leave the installation directory as it is provided (C:\InstatDesk-CZ (English)) to avoid problems with the adjustment of user rights.
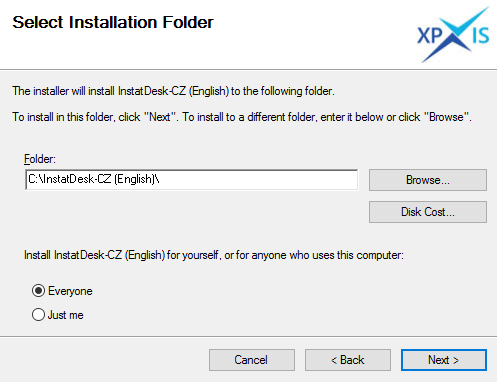
Choosing the installation directory (folder)
Click on "Next>" to confirm your entered data and start copying files.
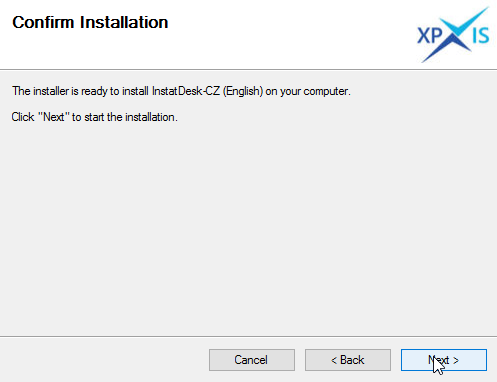
Confirmation of installation
Installation Wizard copies the necessary files to your disk and configures InstatDesk-CZ.

Copying files
By the message about successful installation the process is finished. Click on the "Close" button.
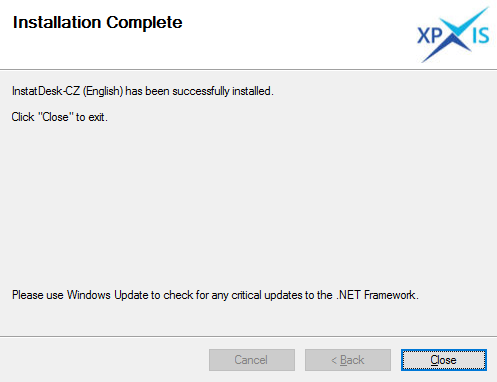
Installation completed message
2.3 Application launch
After you have installed or updated an application you can run it like any other Windows application. The installation creates the InstatDesk-CZ folder and InstatDesk-CZ link in the start menu. For example in the system Windows 10:
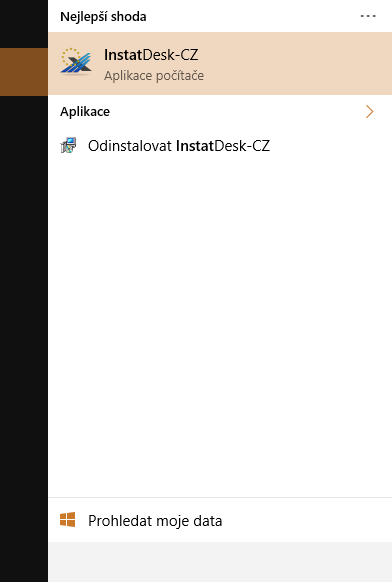
InstatDesk in Windows 10
2.4 New version update of the program
If the InstatDesk is already installed on your computer and you start the installation process the install recognizes the installed version. If the version is lower reinstallation of the program is performed to a higher version without a loss of your data. If the version is equal to or lower than the installed one the installer offers options to repair or uninstall the product. Before each reinstallation back up your data!
2.5 Using the pre-installed version
InstatDesk can be used without installation only by copying the whole directory subtree of InstatDesk-CZ (which was created by a previous installation on some PC) onto another computer. This directory (in ZIP file) is available on the CAW. However this option should only be used in exceptional cases after consultation with the Helpdesk. It is because then there are problems with upgrading to newer versions and repairs of the program described in Chapter 2.4.
3. Main window
3.1 GUI control
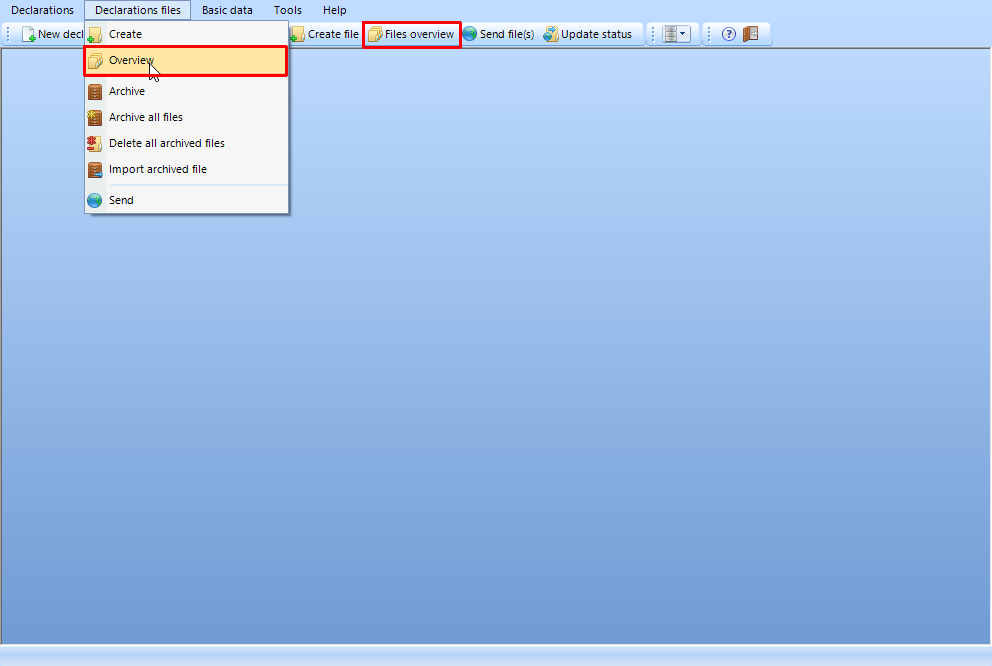
It is a standard Windows application that can be controlled using the keyboard and the mouse. Functions are available from the drop-down menu, the most frequently used are available as icons in the main window. The picture below shows the same feature available from the menu "Declaration files" -> "Overview" or directly as an icon "Files overview".
3.2 Menu "Declarations overview"
Through this option you can work with declaration lines. You can enter data to the program manually or you can import them from other sources. From the menu item "Declarations" you can reach the submenu "New", "Overview", "Import" and "Exit". These submenus are described in detail in Chapter 4.
3.3 Menu "Declaration files"
In the "Declaration files" menu you can create, send, archive, and delete files and even in a multiple selection. There is a sub-menu "Create", "Overview", "Send (a file)", "Archive", "Archive all files", "Delete all archived files" and "Import archived file". The submenus are described in detail in Chapter 5.
3.4 Menu "Basic data"
In this option you have to store the required basic data about the TDP (third declaring party) / PSI (provider of statistical information) as it was registered at the respective Customs office. You cannot work with application without entering the basic data. You can facilitate data entry by creating your own goods labeling and creating standard templates. There is a submenu "Edit", "Export" and "Import". The submenus are are described in detail in Chapter 6.
3.5 Menu "Tools"
This menu item takes you to a submenu "Options", "Backup", "Data Recovery", "Check for updates...", "Core data synchronization" and "Update exchange rates". The submenus are described in detail in Chapter 7.
3.6 Menu "Help"
Under this item you will find extensive information on the use of the program and answers to frequently asked questions. You can use submenu "Topics", "Contact" and "Info". The submenus are described in detail in Chapter 8.
3.7 The first running
When you start the application for the first time you will be reminded to enter the basic data (a sender / third party) and PSI (provider of statistical information) reporting units in accordance with the registration data you provided to the Customs office. This can be done immediately or later in the menu "Basic data" (see Chapter 6).
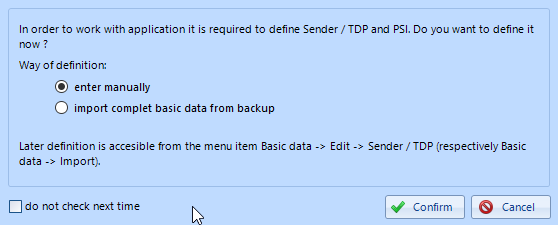
Entering basic data when starting the application for the first time
4. MENU "Declarations"
4.1 Introductory note
This chapter is about the menu "Declarations". In the submenu you can enter new data records, import data from other systems and to display the list of all declarations you have entered in the application. This menu contains a submenu "New", "Overview", "Import" and "Exit" . The submenu is accessed by clicking a mouse. For faster access you can also use icons directly in the toolbar "New declaration" and "Declarations overview".

Drop-down menu

Quick access in the toolbar
4.2 Submenu "New"
Through the submenu "New" you get to entering data in the form manually. Intrastat declarations fields are filled out in accordance with existing regulations for the given year published by the CZSO (Czech Statistical Office). These documents can be downloaded from the CZSO website ([www.czso.cz] (http://www.czso.cz/csu/czso/intrastat)) The application has a built-in codes which are also published by the CZSO but are also available on the website [customs administration] (https://celnisprava.gov.cz/cz/aplikace/Stranky/ciselniky.aspx) in the main menu "Aplikace" -> "??seln?ky" set "Sada" to "Intrastat". Here follows a description of individual fields and control components. Fields that have no other function than to select a value from the codes or to write values directly into the field will not be described because the content is described by legislation.
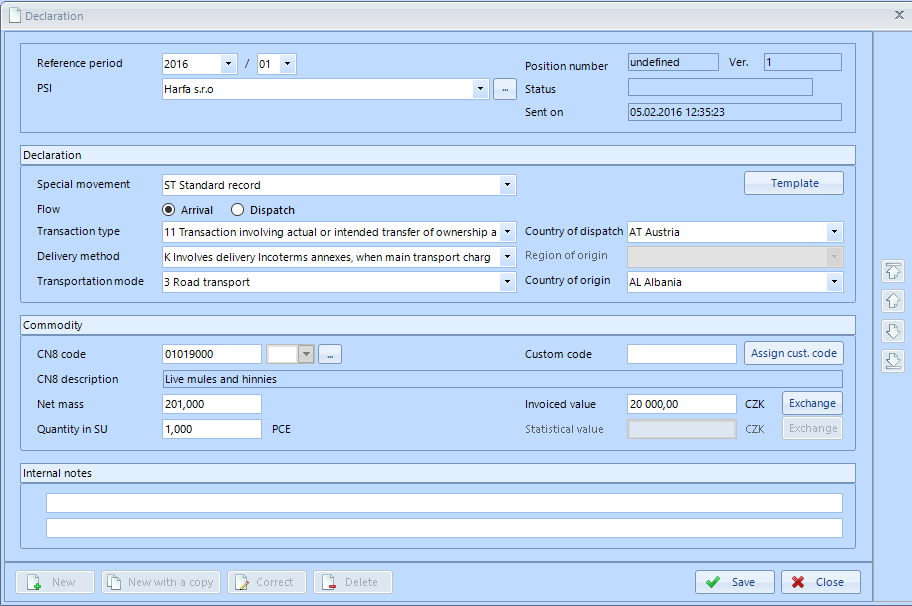
New declaration
4.2.1 "Reference period"
- You enter the period for which the Intrastat declaration is reported.
- The program usually offers the previous month as declarations are frequently reported the next month after the reference period (month).
- You can enter additional reports for any previous month.
4.2.2 "Provider of statistical information (PSI)"
You enter the PSI (provider of statistical information). Even before entering the first declaration you have to enter or import the data you provided for the registration. Use these menu: "Basic data ? Edit ? (PSIs/Sender(TDP))". You can send declarations only for PSIs that you have been assigned during registration.
PSI can be selected from the popup menu. In the case of large amounts of PSIs you can use dialogue "PSI selection" which allows you to search the PSIs based on selected criteria.
4.2.3 "Special movement"
- Usually you fill out "ST" which means standard declaration which is used in the most cases.
- You fill out the "NN" code in case of a negative declaration. This code is used if the unit has the reporting obligation in a given month but no trade was realized. After entering this code the program creates the negative declaration stating only the year, month, flow (if it is a negative declaration for arrival or dispatch) and PSI which reports the negative declaration.
- Other codes are less common and the rules for their use can be found in the relevant legislation.
4.2.4 "Position number"
- Position number is assigned automatically by the program (it is a counter of records for the PSI and the reference period). This number is unique for the given reference period and the PSI. This number has no effect on the reported records and is used only to identify the position of the saved record in the program DB (database). There can be a gap in the numbering of records caused for example by deleting some records. This gap is no problem for the Intrastat system.
4.2.5 "Version (Ver.)"
- It serves for identification of the corrected declarations and it is generated automatically by the program. Each new record (declaration) is generated with Version 1. If you need to correct the already sent declaration you can edit the declaration and save it and the program increments the version number to 2 and so on.
4.2.6 "Status"
- In the field "Status" there is automatically shown the state of the current position after the first saving of the record. It informs you about the current state of the given record at this position. The status value can be "new", "generated", "sent" and "status unknown".
4.2.7 "Sent on"
- In the field "Sent on" there is a date and time of the created declaration which is automatically saved by the program.
4.2.8 "Template"
-
There is a possibility to select your pre-saved template which is saved with your chosen name and holds many items for your frequently used trade goods and transfer them to the current declaration or vice versa. Templates can be stored in the program by this way: "Basic data ? Edit ? Standard templates" or directly from the current declaration form by clicking on "Template ? Add ? (then name the template) ? Save".
-
The template is not linked to the reference period so it may happen that the previously saved template contains data that is no longer valid for the actual period (does not match the actual codes for the reference period).
4.2.9 "Commodity codes"
- The button "Commodity codes" (after the CN8 field) can be used for easy searching of CN8 codes (goods code) for a declaration. The dialog allows you to select CN8 codes from either the complete list of 8 digit combined nomenclature or from your own list of custom codes (for example based on your storeroom product system). This procedure is an alternative to the direct filling out of CN8 code or your custom code.
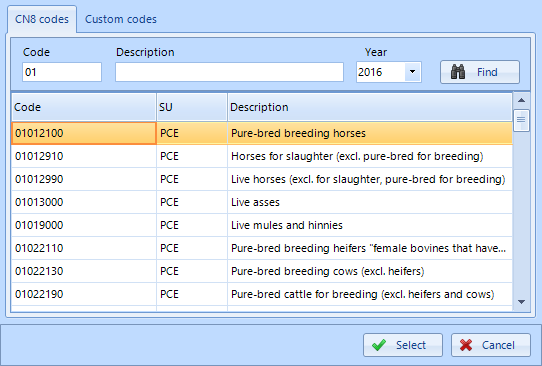
Commodity codes
4.2.10 "Exchange (exchange rates)"
-
Dialog "Exchange" (Conversion of currency) can be used for the conversion of foreign currency into CZK. The program can download the current exchange rates from the Internet. If they are not downloaded it is possible to enter the exchange rate manually. Functions are available in Basic data ("Basic data ? Edit ? Exchange Rates ? Update") - here you can view the rates or update them from the server.
-
If the exchange rates for the given reference period are available conversion to CZK takes place automatically.
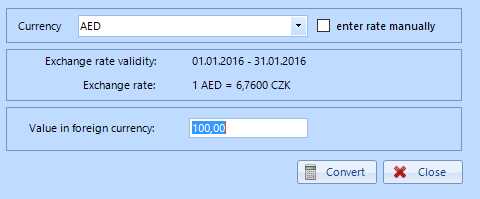
Exchange rates are downloaded
- If the exchange rates for the reference period are not downloaded it is possible to enter the exchange rate manually. By pressing the button "Convert" the converted value in CZK will be transferred to the field "Invoiced value". The required exchange rates for the reference period are available on the website of the Czech Customs Administration. The "Update" button retrieves the actual exchange rates from the Internet.
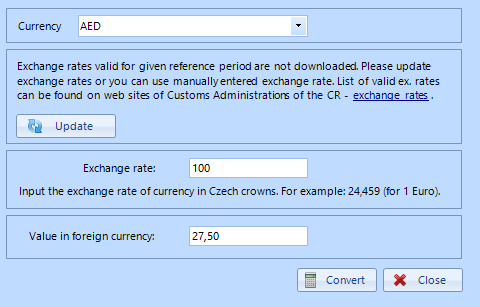
Exchange rates are not downloaded - it is neccessary to enter them manually
4.2.11 "Custom code (custom-made code)"
-
In preparing declarations you can use your own product code and enter it to the field "Custom code" and then press "Enter". In case you have previously saved the item with the corresponding code in the menu " Basic data ? ? Edit ? Custom codes" the corresponding CN8 code and description of goods is taken to the current declaration.
-
Custom commodity code can be defined directly from the current form. After filling out of the CN8 code of goods the button "Assign custom code" is made available where after clicking on the button you can enter in the dialog window your own custom product code. This will be assigned to just entered CN8 code. Furthermore you can see your own custom codes in the menu for CN8 code searching on the second option card.
4.2.12 Operations with the Intrastat declaration form"
- The button "New declaration" - creating a new declaration
Click on the button "New declaration" to get to the new form of Intrastat declaration i.e. you are to create a new entry (declaration). Another possibility how to open the form is through the main menu "Declarations / New".
- The button "New with a copy" - makes a copy of the actual declaration
Clicking this button opens a new form with the data acquired from last record i.e. the last declaration being recorded is used as a template for creating a new record. Data values (net mass, the amount in a supplementary unit and invoiced value) are not copied during this operation and have to be filled out for the new declaration. In the new form you can correct the differing data.
- The "Correct" button - correction of a sent declaration
Newly recorded (and even already generated) declarations can always be corrected (corrected version of the record in this case does not change). On the contrary the already sent declaration is only displayed and can be corrected through the "Correct" button (in this case the version of the record (declaration) is incremented by 1). The correction is received by our server within another declaration file (so you have to create and send the corrected record(s) in a new file). Accessibility of the button "Correct" also depends on the processing status of the reporting file to which the current record belongs - you can correct the record only if the processing status of the given record is "Successful". The records marked as "Deleting" also cannot be corrected. The "Correct" button can be selected by mouse or you can use the key "F6".
- The "Delete" button - deleting declaration
The current data record (declaration) can be deleted using the "Delete" button. Erasing a new (or generated) report presents a physical deletion from the local database. On the contrary the deletion of the already sent declaration creates a new version of the declaration (record) of a special type - deleting record (declaration). In order to delete it from our server (from the Intrastat DB), it is necessary to send the deleting declaration to our server in the next file of declarations. You can delete the record only if the processing status of the given record is "Successful". The "Delete" button can be selected by mouse or you can use the key "F8".
- The "Save" button
Entered records (new, copied, corrected) can be saved by clicking the "Save" button. Before saving the data items are checked for validity (declaration validation). You can save only validated records. The "Save" button can be selected by mouse or you can use the key "F2". If a user tries to save a new (generated) declaration or corrected declaration in which, however, nothing was changed the application notifies him and saving process is interrupted.
- The "Close" button
By pressing this button you can exit the form of the Intrastat declaration. If you have not saved the current record the dialog will appear asking about saving the actual record. The "Close" button can be selected by a mouse or you can use the key "ESC".
4.2.13 Ergonomics of typing and using of the form
- In the form you can navigate using the mouse or tabs. From the drop-down boxes you can choose a value by either expanding the combo box and choosing the required value or by entering your given value when the component (field) has the focus. In the fields - quantity in SU (supplementary unit) and the net mass you have to enter values with 3 decimals. (When you have values greater than 1 the number is rounded and 3 zeros are required after the decimal point.) The program automatically fills three zeros after rounding according to the given special rules for Intrastat.
- After filling out all fields of the form the "Save" button gains the focus and the following dialogue appears:
Dialog when saving declaration
The function of the buttons is the same as in the section 4.2.12 but it simplifies a dialogue in order to carry out the operation without a mouse.
4.2.14 Validation of a declaration
Before saving a new or corrected declaration the validation of items in the form is done. Most validations are done according the Intrastat codes published by CZSO and some validations depend on the relations between items in the given record. If the declaration does not meet certain requirements saving is interrupted and the application displays a dialog with a list and a description of invalid entries. There is an exclamation mark on each invalid field directly in the form of Intrastat declaration (the error description is displayed in a tooltip by moving the mouse on the exclamation mark). Consequently it is possible to correct erroneous data and save the declaration or discard changes and not save the declaration. Some validation can be disabled, see 7.2.1.
*Note: Validations do not contain and cannot include all the rules imposed by regulations. Responsibility for the information filled out is held by the declarant.
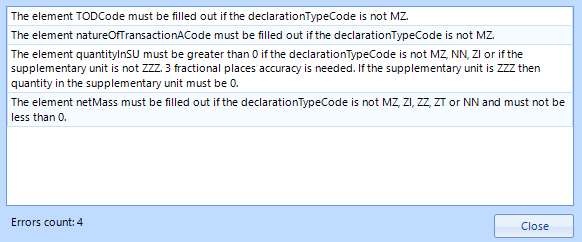
Validation after pressing "Save" button
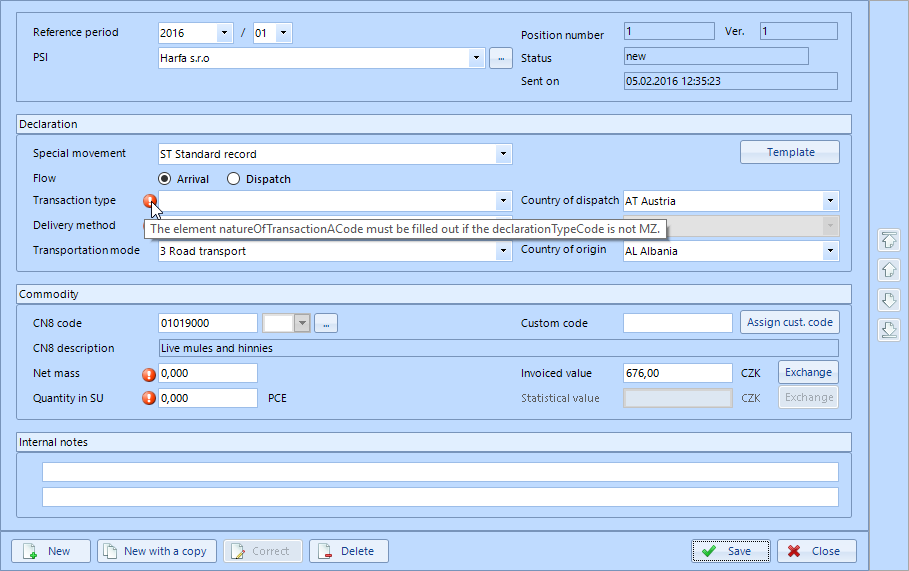
Validation in the form, errors in individual fields
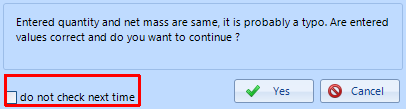
Some validations show a dialogue and can be turned off
4.3 Submenu "Overview" (Declarations overview)
In the submenu "Overview" all existing records (declarations) can be displayed according to position, declarations filename, year, month, PSI, special movement code, flow, CN8 code, invoiced value, state, date and time of reporting. The declarations overview can be filtered and sorted according to various criteria. All data of the selected row including the possibility of correcting them are presented by double clicking the row or by using the corresponding buttons on the form "Intrastat declaration" described in section 4.2. The "Overview" submenu can be selected by "Declarations ? Overview".
Declarations (overview)

You can also use the button in the toolbar with the same functionality.
4.3.1 Meaning of displayed fields
- Status field. Graphically (icons) and clearly shows the state in which the declaration can be. It is a combination of the declaration state, the validity of the declaration, the status of the file and the processing status of the given file
A detailed description of each item in the list is given in chapter 5.8.2 Monitoring the status of the declarations file processing.
- "Position" column.
Position number is assigned automatically by the program. It is a counter of records for the PSI and the reference period. This number is unique for the given reference period and the PSI. These numbers have no further effect on the reported declarations and are used only to identify the positions in the DB of the application.
-
"Declarations file" column. If the declaration is a part of the generated file or already sent declarations file the name of the file is displayed in the field (column). In case of new declarations the field is empty. The name of the file in a more readable format can be viewed by moving the mouse over the declarations filename. By pressing the right mouse button above the field you can copy the actual filename to the clipboard.
-
"Year" column. The year of the reference period is shown here.
-
"Month" column. The month of the reference period is shown here.
-
"PSI" column. Here you can see the names of PSIs (Provider of statistical information).
-
"Type" column. The field displays the special movement code: ST - standard declaration, NN - nil (negative) declaration, MZ - small shipments or another special movement code.
-
"Flow" column. The field displays the flow of goods: arrival or dispatch.
-
"CN8" column. The field displays the 8 digit of combined nomenclature (commodity code or goods code).
-
"Invoiced value" column. Here you can see the invoiced value in CZK.
-
"State" column. Here you can see the actual status of the declaration.
| State (status) of the declaration | Description |
|---|---|
| new | A new created declaration which is not included in the file yet. |
| generated | The declaration was included in the declarations file for sending. (still not sent) |
| sent | The declaration was included in the declarations file and sent to the server for processing. If a serious error occurred during the server processing the declaration line has "the red exclamation mark" if there is only a warning (it means an error is suspected) the declaration line has "the yellow exclamation mark" (see the article 5.8.2 Monitoring the processing status messages). |
| - | The state is undetermined - status unknown |
- "Date" column. Here you can see the date and time of the creation of the declaration.
It does not mean that the data are immediately sent to the Czech Statistical Office!
-
"Version" (Ver.) column". Here you can see the version of the declaration (1: original, > 1: corrected / deleting).
-
"Deleting" column. In case the declaration is deleting there is an indicator - the green check mark.
4.3.2 Operations in the "Declarations overview"
-
Selecting data records. Data records can be selected by a mouse or a keyboard. All entries can be selected by pressing "Ctrl + A". For selecting all, deselecting all or inverse selection you can also use special buttons in the toolbar.
-
Displaying the selected declaration (row). By double-clicking on the selected row or by selecting the row and pressing "Show / Correct" (shortcut key "F6") you are entering the Intrastat declaration form which displays all the information about the selected record.
-
Filtering the declaration overview. For quick filtering of declarations you can use the filter panel, which is located above the list of declarations. To apply filter press the "Apply" button. In the declarations list will then be displayed only those items that meet the criteria of the selected filter. By pressing the "Cancel" button you are cancelling the filter and the list again displays all the items (without archived declarations). The more detailed filtering by multiple attributes is possible by pressing the "Advanced" button. The program will offer an extended dialogue with filtering. Application / cancelling is the same as with the quick filter. The applied filter is indicated by a red inscription "Filtered" on the left side at the bottom.

Indication of filtered declarations
Important: The program remembers the filter settings even after restarting which can cause that you do not see the data you want to see! It is indicated in the bottom left corner by the red sign "Filtered". Then it is necessary to cancel the filter by clicking on the "Cancel" button.
Note: The option "Hide accepted deleting declarations" serves to streamline the declarations list - when checked, the sent and accepted (in our Intrastat system) deleting declarations will not be shown.
- Advanced filter. This filter extends the capabilities of filtering data for other items. It can be useful to filter by "Type of error". When selecting "Import Errors" there will be displayed imported sentences with errors that must be repaired. When using the filter "Warnings - possible errors" you can view items accepted but with suspicion for an error.
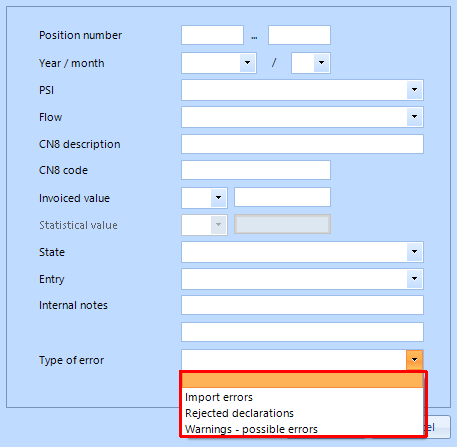
Advanced filter
-
"New" button. This button (shortcut "Ctrl + N" or "F4") can be used to enter into a new form of Intrastat declaration.
-
"New with a copy" button. Clicking this button opens a new form with the data acquired from the actual record i.e. the last declaration being recorded is used as a template for creating a new record. Data values (net mass, the amount in a supplementary unit and invoiced value) are not copied during this operation and have to be filled out for the new declaration. In the new form you can correct the differing data.
-
"Show / Correct" button. This button (shortcut key "F6") is used to enter into the form "Intrastat declaration" of the selected record and you can correct any item. The separate article is dedicated to corrections (article 4.3.3.)
-
"Delete" button. By this button you can erase all selected declarations that meet the conditions for deletion (see the article 4.2.12). The button is accessible only if all selected declaration meet the conditions of deletion.
-
To prevent accidental deletion of data the dialog box is displayed for confirmation of the deletion.
-
"Summary" button. After pressing the "Summary" (shortcut "Ctrl + P") you can see summary values of invoiced value and net mass either of all currently displayed declarations or only selected declarations (if you press the "Summary" button and simultaneously hold down the key "Shift"). This function can be used for an immediate check of data.
Warning: The summary does not include deleting records.
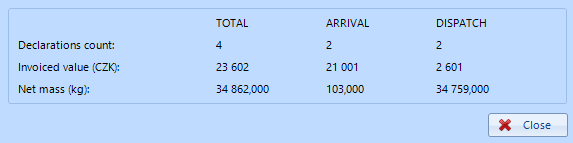
Summary view
-
"Refresh" button. The button "Refresh" updates the list of declarations. The newly received items are displayed and sorted.
-
"Export" button. By this control button (shortcut "Ctrl + X") you can export the displayed records to CSV (comma separated values) files. These transferred data can then be processed in other programs or printed in a list form. You can edit the data in another product (for example Excel) and then re-import them. More about importing in the article 4.4.
Notice: The CSV files are not accepted as declarations files!
This opens a dialogue for selecting the destination directory to which the CSV file will be exported. Select the directory, enter the file name and press the "Save" button.
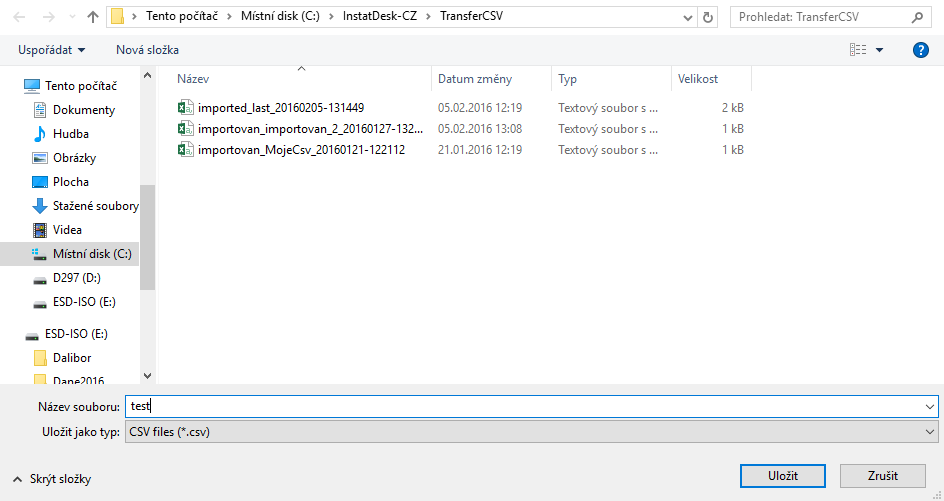
Saving a CSV file
You will be informed about the successful export of the file.
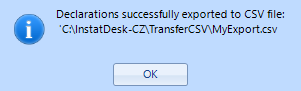
Information about a successful export
4.3.3 Corrections and deleting of declarations
4.3.3.1 Basic rules
- Corrections are carried out in the "Declarations overview" by working with declaration lines
- If the declaration has already been sent it must have a status "Accepted"
- By correcting of already sent declaration the new (corrective) declaration is created which has to be sent
- Not sent (new) declarations can be corrected or deleted at will (independently) because they are only at your local program and it is not necessary to ensure the correction on the server in our Intrastat system DB.
4.3.3.2 Procedure
In the "Declarations overview" find the row for correction or deletion. Check whether the state of the declaration is "Accepted" or it could be a new declaration. You can double-click the row or use the "Delete" button or the "Show/Correct" button. If you press delete you are offered an immediate deletion. If you want to delete multiple rows you can select more rows by usual combinations of keys or mouse movements (for example: Shift + left mouse button clicking, CTRL + A - Select All).
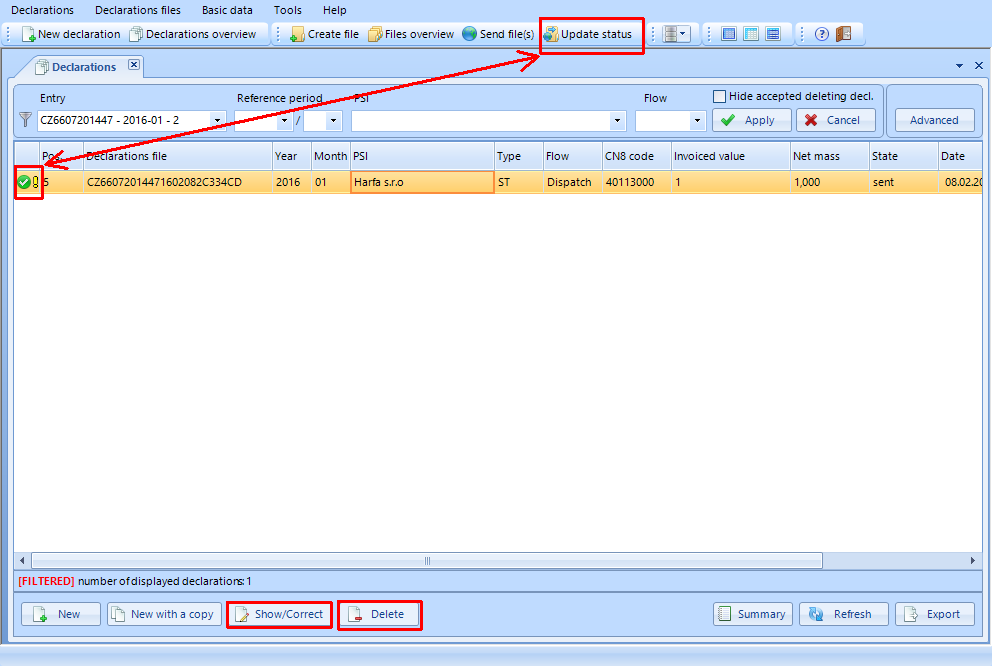
The corrected declaration must be in the state "Accepted" (green checked icon)
After opening you see the line in the form window below.
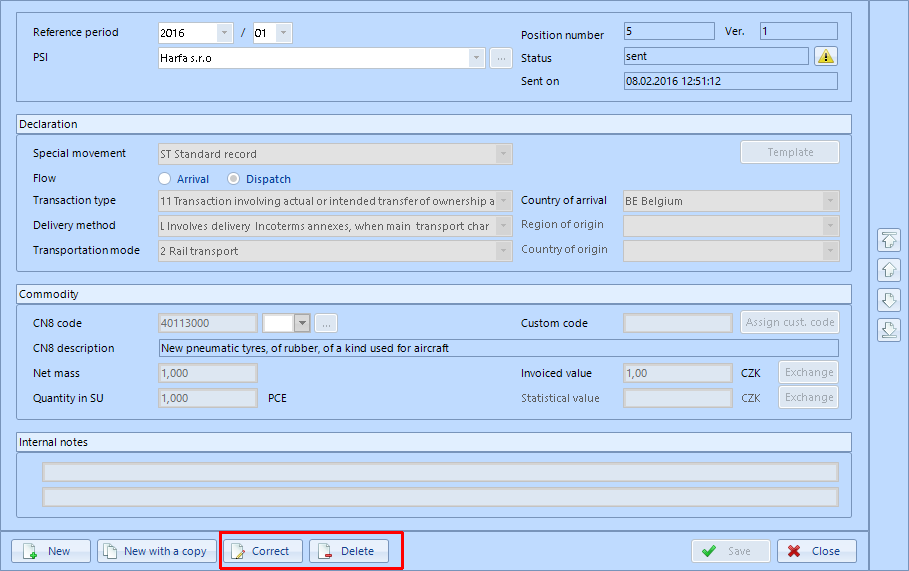
The form before it is available for editing
You can select "Delete" for deleting the declaration or "Correct" for correction. After pressing "Correct" the fields become available for editing. Make a deletion or a correction and save the record (declaration).
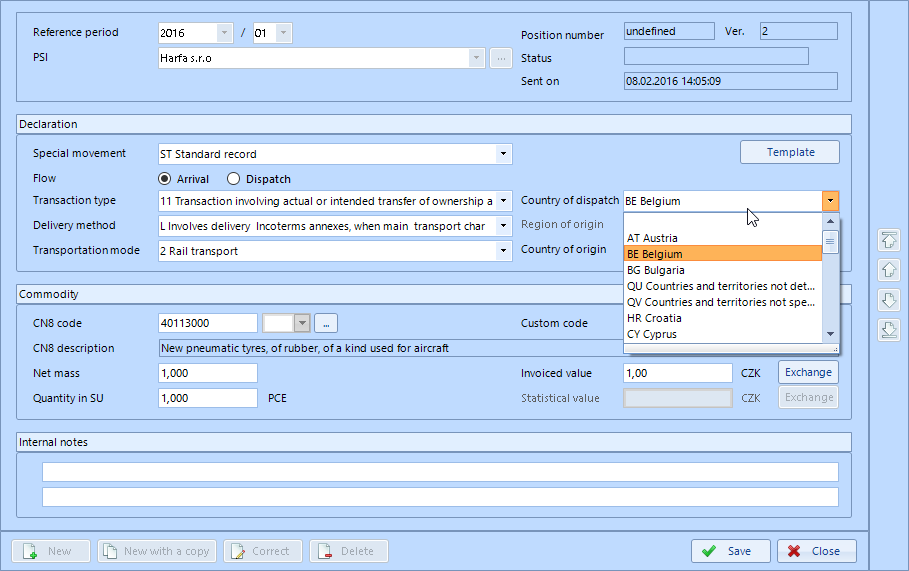
The form available for editing
You will see the message about saved corrections or deletions.
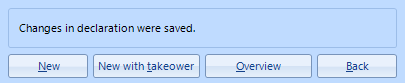
A message about saved changes
In case it was a new declaration the change is made in your local database. If it was already sent declaration then the new declaration with corrections or deleting declaration is made. Of course the new records with corrections or deleting records must be sent to the Intrastat server DB.
Create a new declaration file.
A declaration file containing the corrected declaration is created.
In declaration files we see the corrected file as a second version of the original file. Do the usual sending of the file.

4.4 Submenu "Import"
In the submenu "Import" you can import declarations to the InstatDesk-CZ application from external sources. The menu import is entered through the menu "Declarations ? Import". When you click on the submenu you can choose the file in the window "Select file for import". An import is possible only from the CSV file which format is given here.
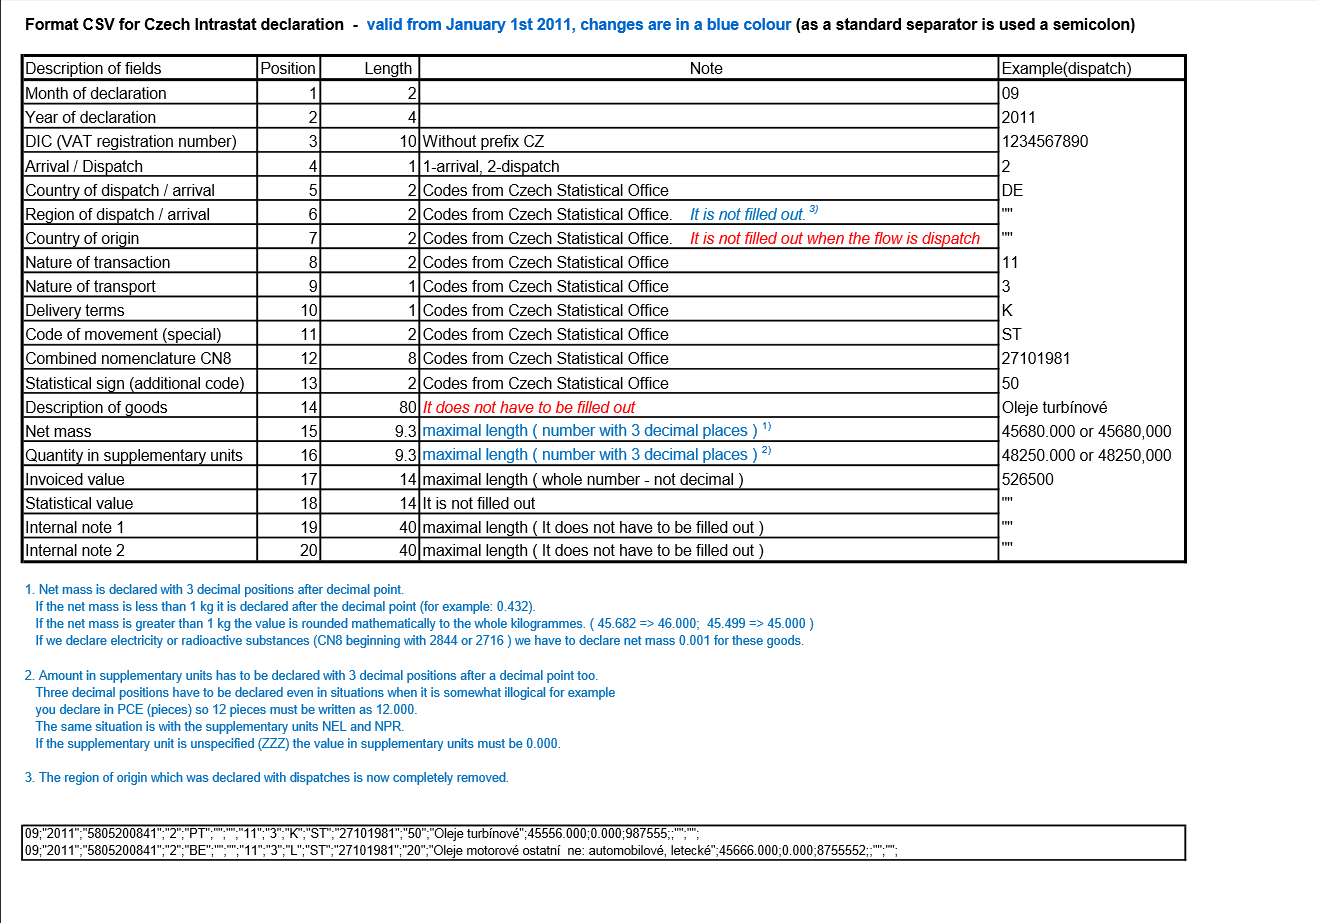
Structure of the import CSV (comma separated value) file
4.4.1 Import from CSV file
- In this submenu you can import declarations into the program from an external source of data in the CSV format. After clicking the menu item you enter the selection window where you can select a file for import. Data can be imported into the program by clicking on the "Open" button.
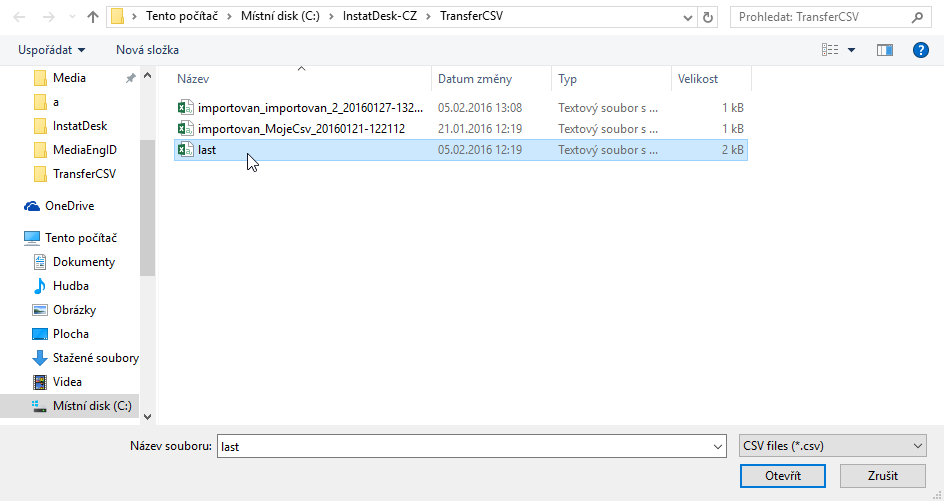
Selecting a file for import
When you import records data validation is done. The number of data records and possible problems (errors and warnings) in the CSV file are displayed in the information dialog box. If the CSV file contains some errors then the errors are red colored in the information dialog. The program does not allow acceptance of declarations with serious errors. If the data file contains valid entries and a warnings (failure to comply with certain requirements of regulations and Intrastat codes from CZSO valid for the period) the user can decide whether he wants accept records from the data file or discard the imported records. You can filter and subsequently correct items in records according to Section 4.3.2 - "Advanced" filter.
Confirmation of accepting data
Accepted erroneous entries are indicated in the declarations overview with lightning sign icon at the status column. If the errors are not corrected it is not possible to send the records to the server.
Indications of accepted incorrect records
With a large number of errors it is recommended to make corrections in the data source. Getting data with a large number of incorrect entries is not recommended and should be interrupted by pressing the "Discard" button. In the case of accepting incorrect entries can be corrected one by one.
4.5 Submenu "Exit"
By selecting this submenu item (shortcut "Alt + F4") the program InstatDesk-CZ exits. If the program has yet unsent declarations files you will be notified when exiting it. This control can be turned off so the next session will not carry out the check.
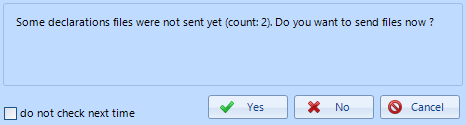
Warning about the unsent file(s)
When exiting the application you will be advised to make a backup of the database. This recommendation can be turned off for the next session.
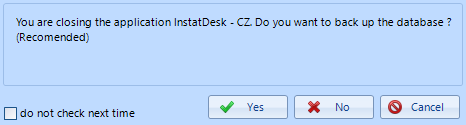
An automatic backup of the database when exiting
5. Menu "Declarations files"
5.1 Introductory note
This chapter clarifies items in the sub-menu "Declarations files". In the submenu you can see options "Create", "Overview", "Archive", "Archive all files", "Delete all archived files", "Import archived file" and "Send".
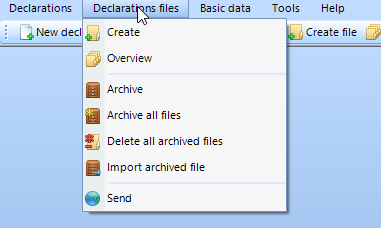
5.2 Submenu "Create"
This submenu is also available from the toolbar.

A quick access from the toolbar.
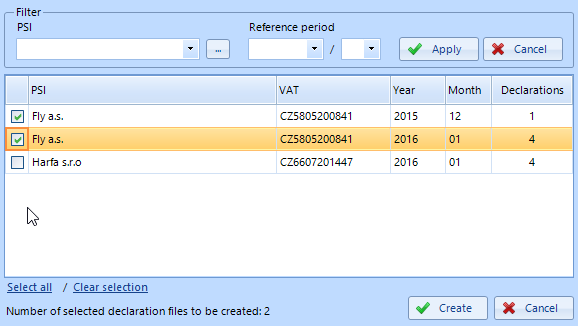
In the submenu "Create" declarations files are created for subsequent sending. By selecting "Declarations files ? Create" the selection of the given files for the given reference periods is shown in the window on the screen.
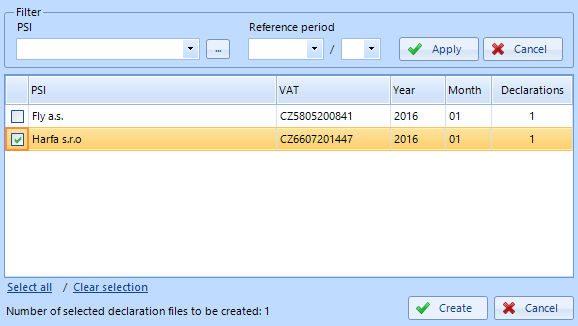
Create file dialogue
Each declarations file represents all unsent declarations (lines) separated for each declarant (PSI) and reference period, i.e. a file can contain data only for one reference period and one PSI. After the successfully created file no declarations are left for the given PSI and the reference period at the moment. The name of the file is created with the structure "VAT number" + "Reference period" + "Time of creation". The window for selecting the declarations files to be created provides filtering. In the next step the window with information about the created file appears.

Creating declarations files
In the dialog you can see the generated file name, the reference period for which the file contains records, the number of entry item (order) and the number of declarations that are included in the file. By clicking on the "detail" button you will see detailed information about the file. You can also click the "Go to send" button and immediately send the file(s) (sending will be described in the next section) or you can use the button "Close" and send the file(s) later.
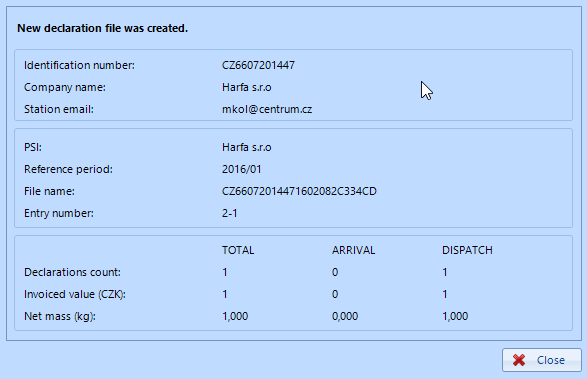
Details of the declarations file
Important Pay attention to the reference period! It may happen that by mistake you import data for a wrong period and these declarations are then viewed as additional declarations and added to the reference period. For the required reference period on the contrary you sent no declarations.
5.3 Submenu "Overview"
Submenu "Overview" enables to work with the already created declarations files. You enter the submenu via the main menu option "Declarations files ? Overview" or by using a quick access from the toolbar.

Quick access from the toolbar
The entire window looks like this.
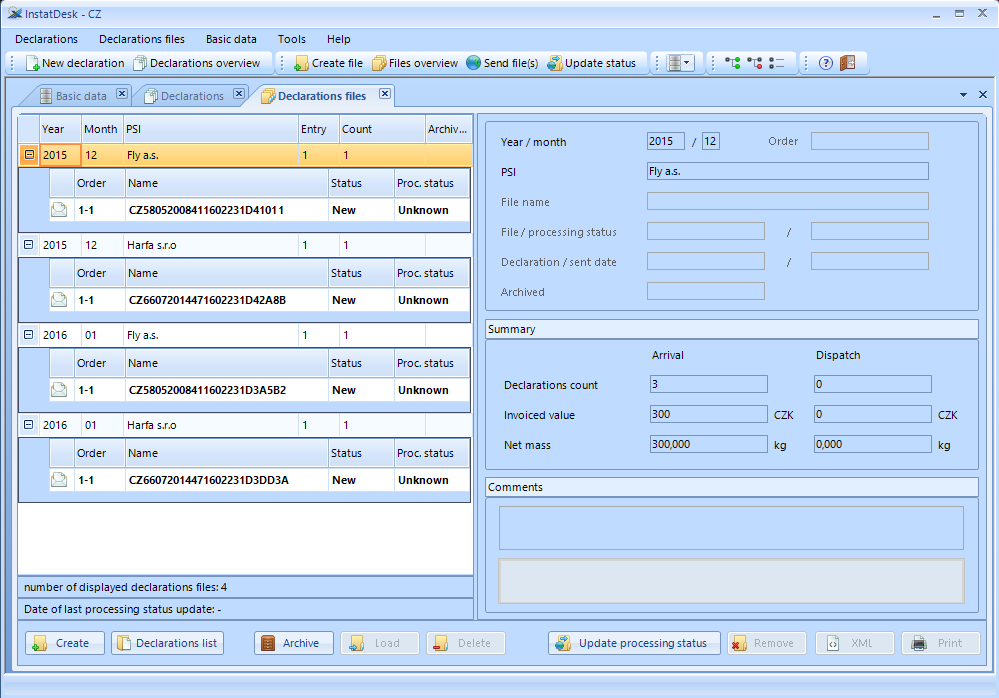
Declarations files overview
5.3.1 The principle of form
In the list of files there are hierarchically displayed all created groups of declarations grouped by filing numbers (Entry number), reference period, PSI. The group of declarations files or a specific declarations file can be selected by clicking the mouse on the desired line. The right side of the form displays information about the selected file. Some features are available for group of declarations files and some just for a particular file. If you want to work with a specific declarations file click on the icon  . This option is not available if the file is archived.
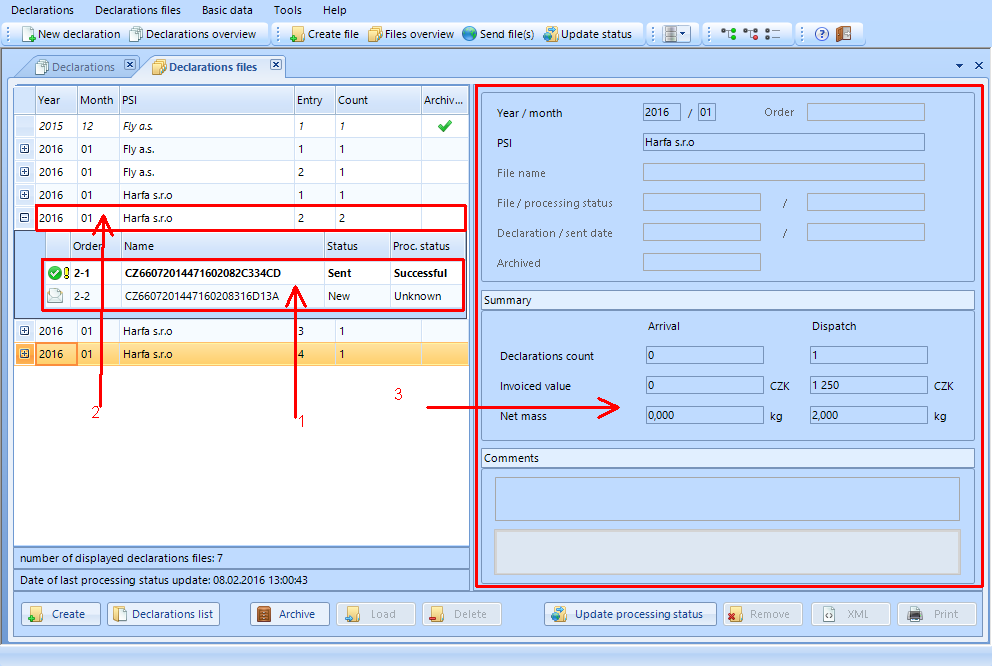
Declarations files overview with details
: Description of the picture with the arrows in the picture Declarations files overview with details
Group of declarations files (arrow number 2). List of fields:
- Year, Month - reference period of declarations
- Name of a PSI
- Entry - filling number in the reference period for a specific PSI
- Archived - A green check mark indicates that a file is archived thus removed from the application DB and you cannot access its records (declarations). Records can be made available by the "Load" button. For more information see the data archiving.
Specific declarations file (arrow no. 1). List of fields:
- Status icon (it depends on the processing status, see the processing status)
- Order - the first number indicates the sequence number of entry (submissions) for the PSI and the reference period, the second number is the sequence number of the given original file, for example: 1-2 means that for the file (1-1) was sent the corrected second version of the first declarations file so it is now version 2 (ie. 1-2).
- Status
- New - new generated file (not sent yet)
- Sent - the already sent file
- Rejected - during the file processing on the server the errors were detected in the declarations file - the file is not accepted
- Error during sending - Sending of the file failed (server may be temporarily unavailable)
- Refused - the file was refused by the server for other reasons (for example: original report file was deleted from the server)
- Processing status (Proc. status)
- Waiting - the file is in the queue and waiting to be processed
- In processing - the file is being processed
- Successful - the file was successfully processed (accepted)
- Failed - the file was rejected because of serious errors
- Waiting for processing - the file is in the queue and waiting for processing
Additional information (arrow no. 3). List of fields:
- (*) Declaration date - date of the file creation a exact timestamp
- (*) Sent date - date of the sending of the file with the exact timestamp (only for already sent files)
- Archived - date of the archiving of the file (only for archived files)
- (+) Declarations count - number of records in the file (for arrivals and dispatches)
- (+) Invoiced value - sum of invoiced values
Explanations:
(*) available only for the given declarations file
(+) for the given declarations file you can see information regarding the specific file, for the one file (filling entry) you can see information for the entire set of declarations (also taking into account the corrections and deleting declarations)
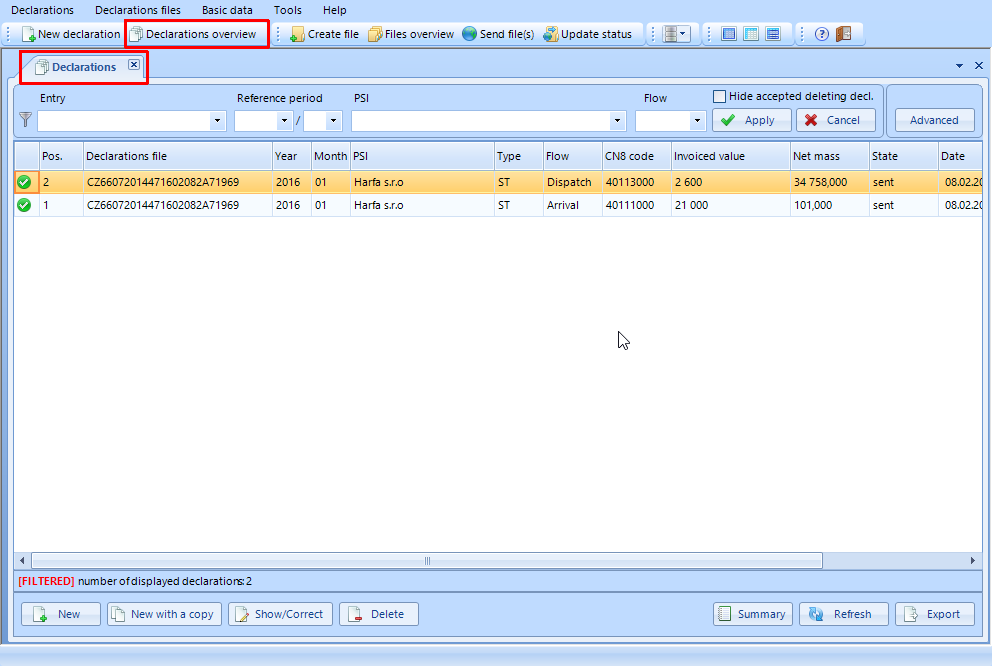
5.3.2 History of the declarations file - an example
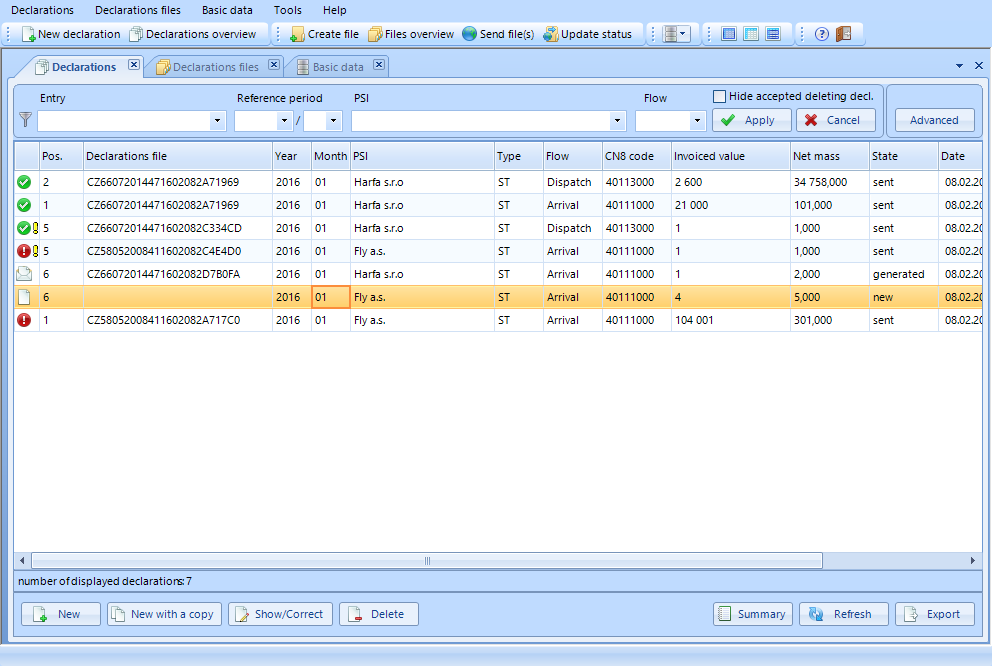
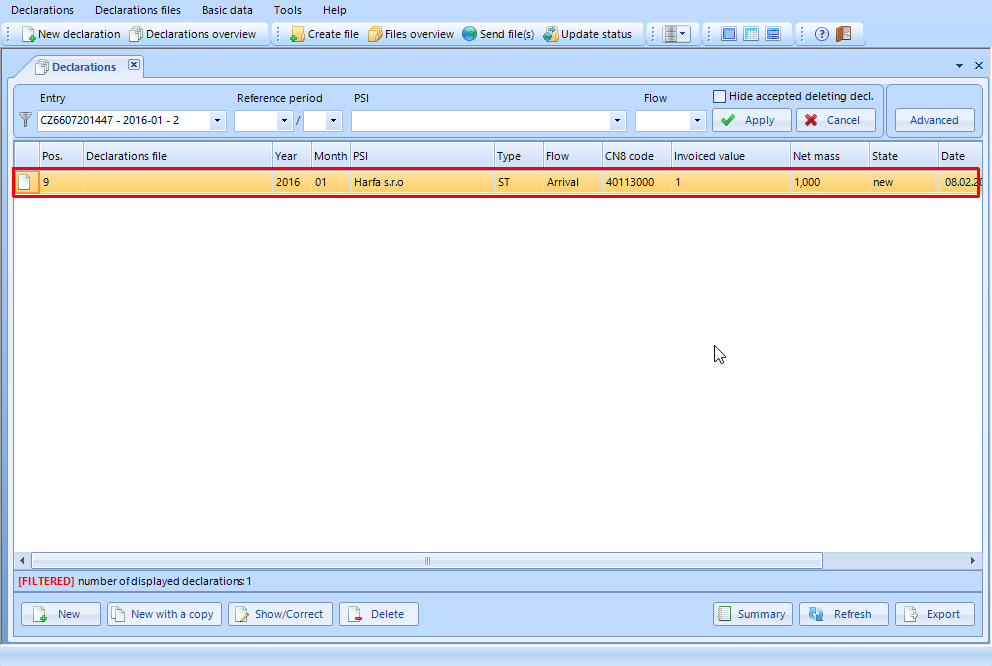
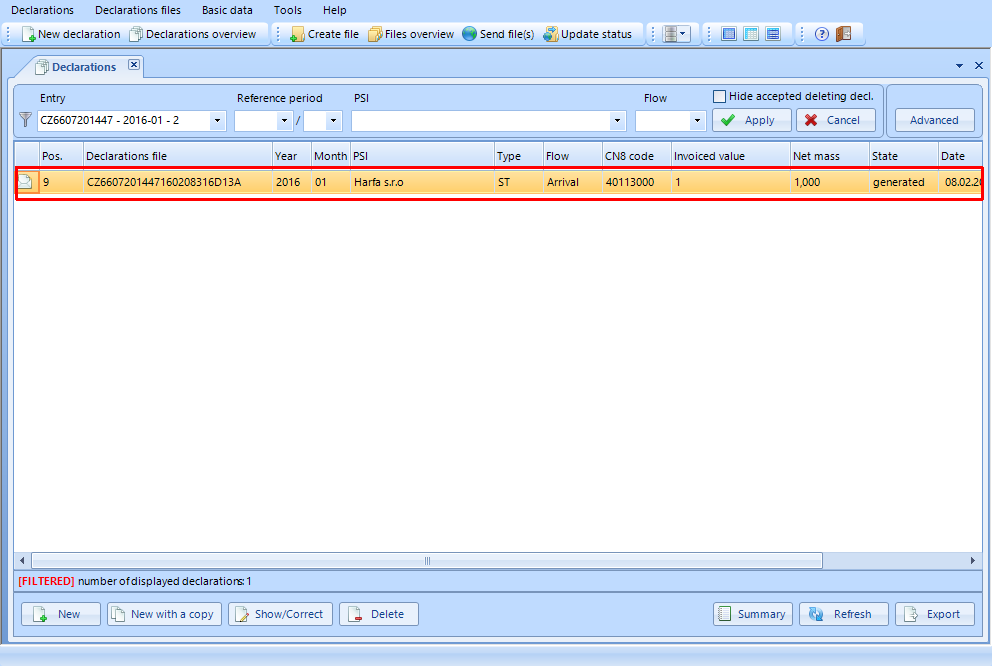
The following picture shows that the Harfa s.r.o. for the period 01/2016 sent the file (order 2-1) to the server. The sender noticed that he made a mistake in the declarations and therefore he corrected the declarations and created a new (correction) file (order 2-2). The file still was not sent to the server for processing.
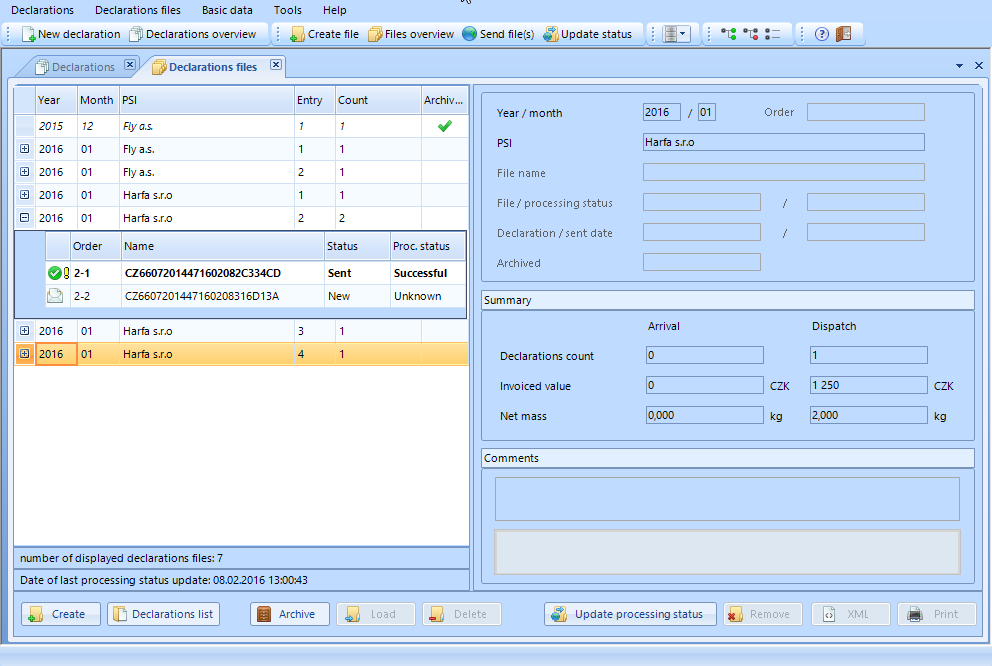
Viewing the history of declarations
5.3.3 Operations with the form
- The button "Create" - Create a new declarations file
You enter into the dialogue "Declarations file" as in Section 5.2 (shortcut "Ctrl + N" or "F4").
- The button "Declarations list" - Viewing the declarations overview for the entry file
After using the button (shortcut "Ctrl + S") the program switches to the form (window) of "Declarations (overview)" and automatically adjusts the filter so that the form displays only declarations belonging to the selected entry file. Consequently it is possible to view or edit the declarations. The same result is achieved by double-clicking on the selected declarations (entry) file. The declarations list cannot be displayed for archived files and for a specific (entry and order) declarations file (it can be displayed only for the whole filling (entry)).
- The button "Archive" - Archiving of the declarations files
This button (shortcut key "F7") can archive the selected file. The declarations belonging to the selected file (entry) will be moved to the archive folder of the program InstatDesk-CZ and will be erased from the local database. At the same time the entry is identified as archived and can be retrieved back from the archive or can be deleted from the "Declarations files" overview. Archived files are kept in the archive folder as zip files (the folder: \ [application directory ] \ Archive) and have the form \ [PSI-year-month-entry].zip. These archived files are not included in the backup file (menu: "Tools ? Backup"). We recommend to backup them to other media
Important Archiving needs to be performed periodically and in particular if the application use the large amount of data in DB which may slow down the application performance.
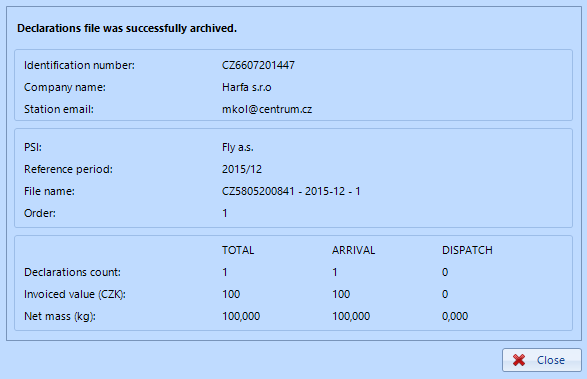
Information about archiving the declarations file
- The button "Load" - Retrieving the archived declarations files
This button (shortcut 'F3') can the already archived file load back into the program. Reloaded declarations can then be corrected. This button is active only in case of an archived file.
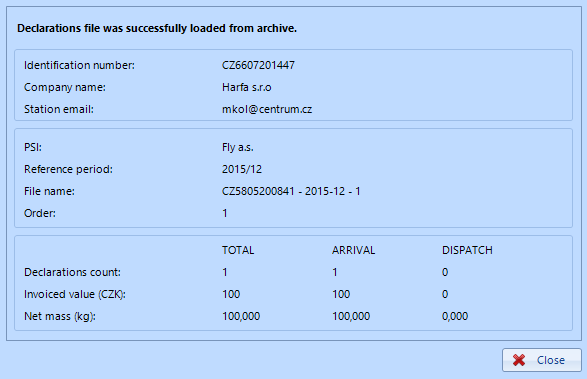
Information about the loading of the archived file
- The button "Delete" - Delete the archived file from the "Declarations files" overview
This button (shortcut key "F8") can remove the selected file from the DB of the InstatDesk-CZ application. However this is possible after archiving the file (if the file is not archived the button is inactive). The declarations file will no longer appear in the list but it remains stored in the folder "Archive" and can be reloaded back into the program - see Chapter 5.4.-5.7. To prevent an accidental deletion of the file the dialog box is displayed in which you must confirm the deletion.
- The button "Update processing status"
This button submits the request to determine the processing status of declarations files sent to the server. The answer received is processed and reflected in the declarations files overview - the sent files are assigned the current processing status. In case some declarations contain errors the fact is reflected in the declarations overview where it is possible to correct errors right away. More information about the processing status and error handling can be seen in the chapter 4.3.3.
- The button "Remove" - removing of the rejected file
This button can remove file that is rejected. The button is active only for files that are in the status "Rejected". The following dialogue is offered for a choice of what is done with declarations that are inside the file. Declarations are either completely erased or are copied and saved as new declarations which can be edited and sent again in a new file.
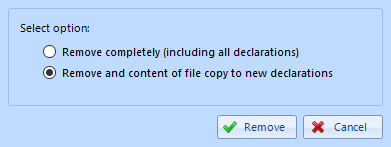
Removing a rejected file
- The "XML" button
By clicking on the button (shortcut "Ctrl + X") you can generate an XML representation of the selected file. This file can be transferred to another program. XML files are only for your needs. After selecting the directory and the name of the XML file it will be generated and then it is displayed in the preset browser.
The button "Print"
You can print only the brief overview of the sent file with the status "Successful" or "Failed". After pressing the "Print" button (shortcut "Ctrl + T") you will see the default browser page with the brief information suitable for printing.

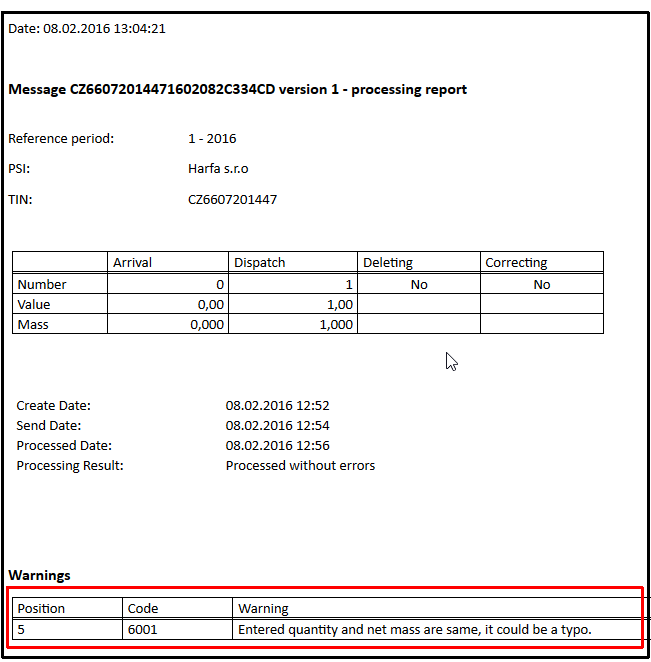
The example of the content of the brief overview report of the declarations file
5.4 Submenu "Archive"
This submenu has the same function as the "Archive" as described in Section 5.3.3. Unlike the mentioned function it enables selective archiving. Check the boxes to select the files you want to archive or choose "Select All" for archiving the selected files.

5.5 Submenu "Archive all files"
The same as in 5.3 it directly executes archiving of all files with no options.
5.6 Submenu "Delete all archived files"
This option deletes all archived files. The files remain available at the disk folder and can be retrieved by the functions described in paragraph 5.7.
5.7 Submenu "Import (of) archived file"
This submenu can be used to load the archived files that have been deleted from the local DB of the application after archiving. You can enter the option menu by selecting "Declarations files" ? "Import archived file".
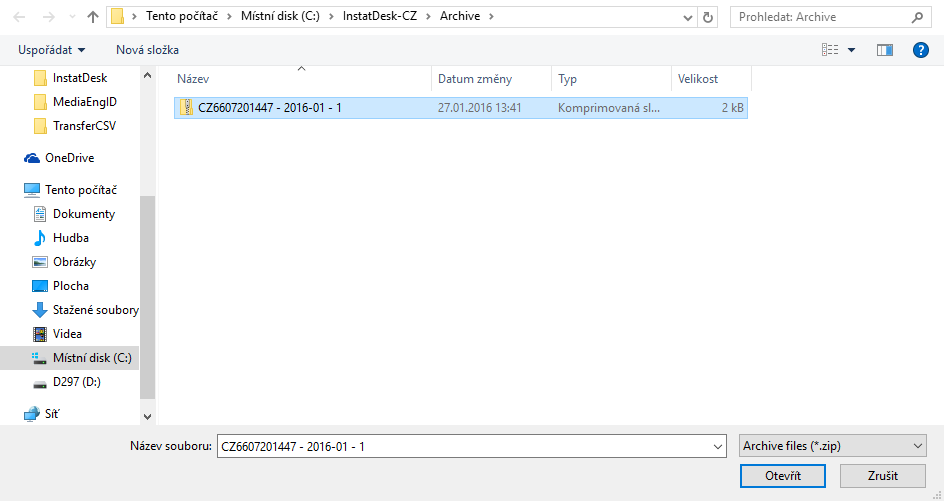
Selection window of an archived file for import
After selecting the desired archived file the data are imported in the program database of the application InstatDesk-CZ. The file is then displayed in the Declarations files overview. You can use it for example for corrections.
Note:
You can import only the archived files that were created in a compatible version of the program!
5.8 Submenu "Send (a file)"
5.8.1 The process of sending
This option is also accessible from the toolbar menu by clicking on the same icon.

In the toolbar menu
In this submenu you can send the previously generated files which were not sent yet to the General Directorate of Customs Administration in Prague. After the menu selection the folowing dialog window appears:
Selecting generated files for sending.
You can select all for sending or a specific message and press "Send". In the case you have set the "Declarations aggregation" (the principle and settings are described in more detail in section 7.2.4) the information about aggregation will appear.
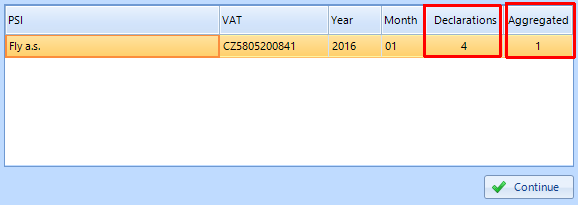
Information about the performed aggregation
Furthermore you are prompted for a password. Getting of the password is described in paragraph 1.2. The login email is saved in your "Basic data", see 6.2.1. The password is entered only once for the current session until exiting the application.
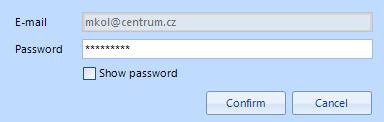
Entering the password
Important For successful sending it is necessary to have the correct system time on your PC. A difference of more than two minutes is not acceptable. In the case that the time is correct and the password is still not accepted test the connectivity to our server (7.2.3.).
After successful entering of the password you will see for each file a window of the file sending, aggregation message and the message of the file saving on the server.
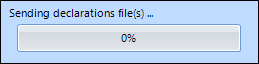
The sending process

Message about saving on the server
Important Sending a file to the server does not mean the file is automatically accepted by Customs Administration. On the server the files are validated and then saved to the DB. If the validation is not successful the file is rejected as a whole. Therefore it is necessary to look at the processing status of the file according to the paragraph 5.8.2.
5.8.2 Monitoring of the processing status
5.8.2.1 Updating of the processing status
The "Update processing status" button on the "Declarations files overview" or the toolbar option "Update status" enable to get the current processing status from the server - the application does not update the status automatically.
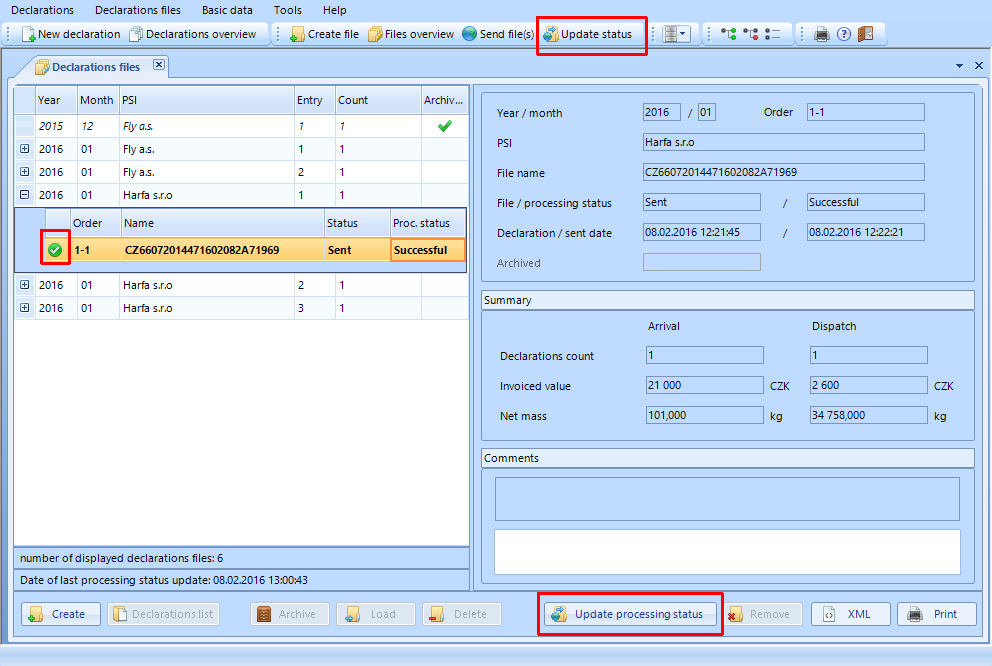
Two ways to update the status
Important:
The files sent from individual senders are saved to the server queue and are processed in the order as they were received. After the processing and validation the answer (the status) is generated which you can retrieve from the server (as mentioned above). The processing and generating the response can take a long time (even several hours) especially in the last two days of data collection for the reference period. It depends on the size of files being processed and thus the size of the queue. So if you cannot obtain the processing status "Successful" or "Failed" you can exit the application and try it after few hours or next day. When there is no big queue on the server the file is processed usually in 4 to 20 minutes.
Text description of the processing status is displayed by combination of two fields: the "Status" and "Processing status" and also indicated by the appropriate icon in the "Declarations overview" and the "Declarations files overview".
5.8.2.2 Processing statuses
After successful sending of the file the file can have these processing statuses.
Processing statuses of the file
None of these statuses is an accepting message of the file from the Customs Administration of the Czech Republic. All these statuses are processing statuses before the final statuses. The final statuses of which one must be achieved are "Accepted" ("Successful") or "Rejected" ("Failed"). These statuses also can be seen for all the rows in the Declarations overview. Since the processing statuses are not final it is not possible to make corrections.
- STATUS "Successful"

Successful
The declarations file is received on the server and passed validations and will be handed over to the CZSO. This status is reflected in all declaration rows. It is possible to correct items if you need.
View of accepted declarations in the overview
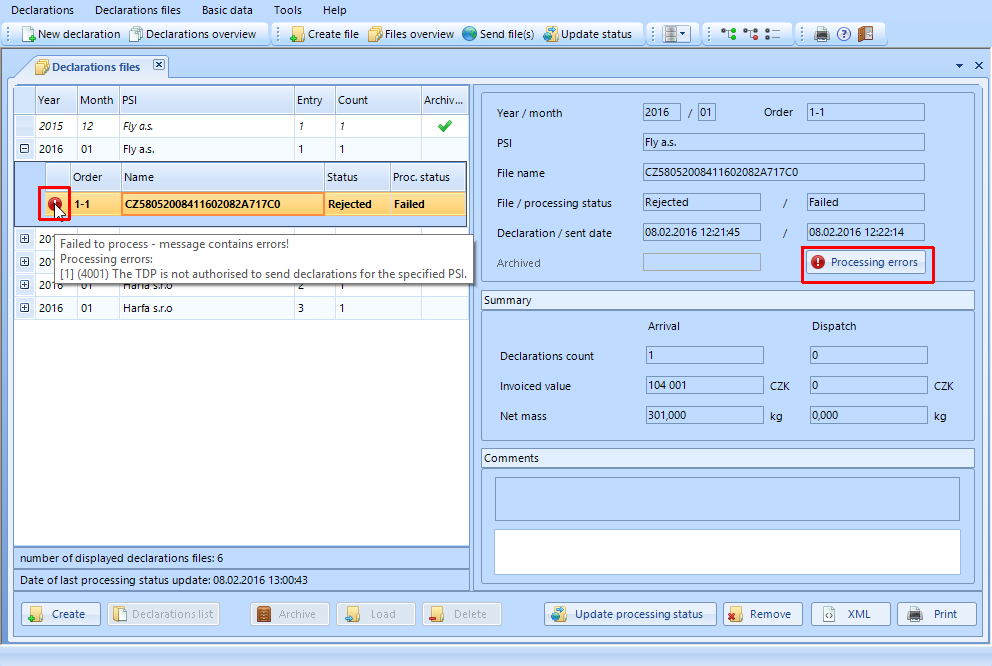
- STATUS "Failed" (Rejected)
 The rejected file in the Declarations files overview
The declaration is rejected the reason for the rejection you can find either by moving the mouse pointer over the icon for rejection or by pressing the button "Processing errors" on the right part of the form. You must be at the position of the particular file (the file has to be selected) to see the active button.
Important If the file is rejected it is not stored in an active Intrastat database on our server so after corrections you can send it again without creating duplication of records. You can remove the file by the "Remove" button and you will be offered the option to completely remove its content or to copy the declarations as the new declarations so that you can make corrections and send it again.
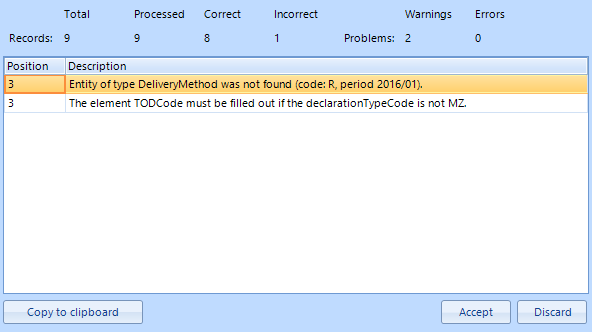
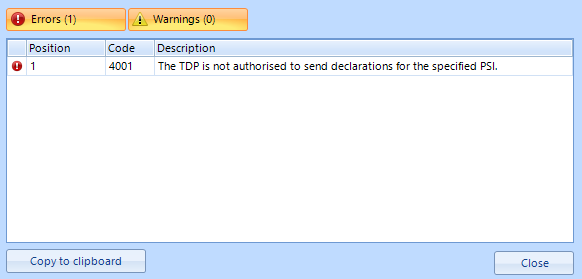 Display of error(s) after pressing the button "Processing errors"
Example
In the specific case on the picture the sender declared as a TDP (third declaring party) for a PSI which was not assigned to the TDP during the registration at the Customs Office so it means the TDP does not have the right to declare for the given PSI. It is therefore necessary to make the registration at the Customs Office and send the file again.
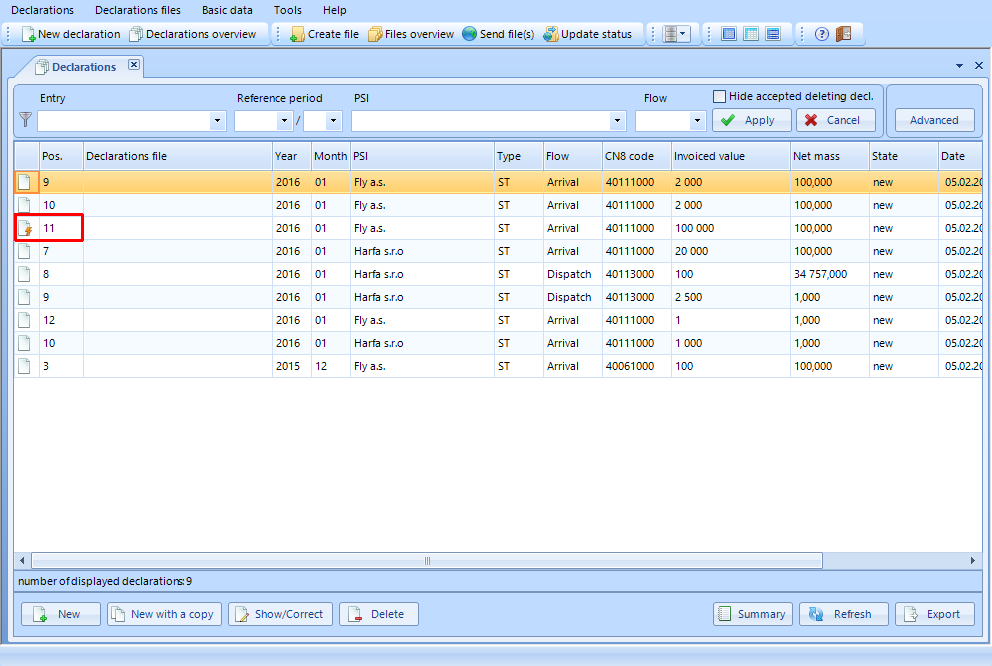
In the overview of rejected declarations the icon appears for each of the rejected rows of the declaration file.
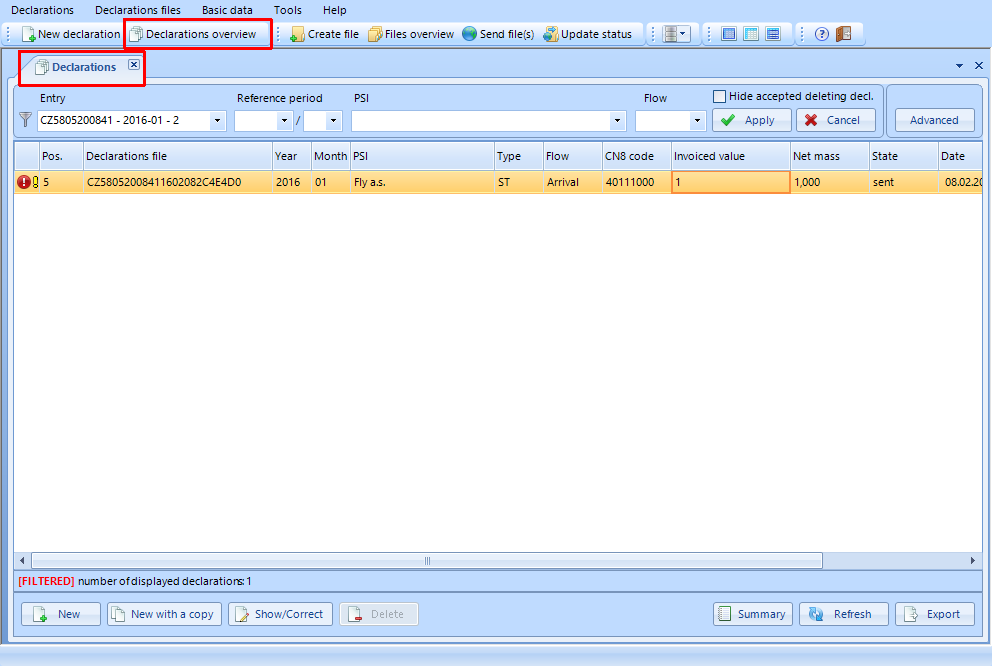
Display of the rejected declarations in the declarations overview
- STATUS "Warning"
This status is marked with a yellow exclamation mark and expresses a suspicion of error - the file is accepted and if you know that it is okay you do not have to do anything. In the case that this is an error you have to correct it. Warnings can be present both for an accepted and for a rejected file. The reason for a warning you can find either by moving the mouse pointer over the icon of the warning or by pressing the button "Warnings" or "Processing errors" (Tab - Warnings) on the right side of the form. You must be at the position of the particular file (the file has to be selected) to see the active button.
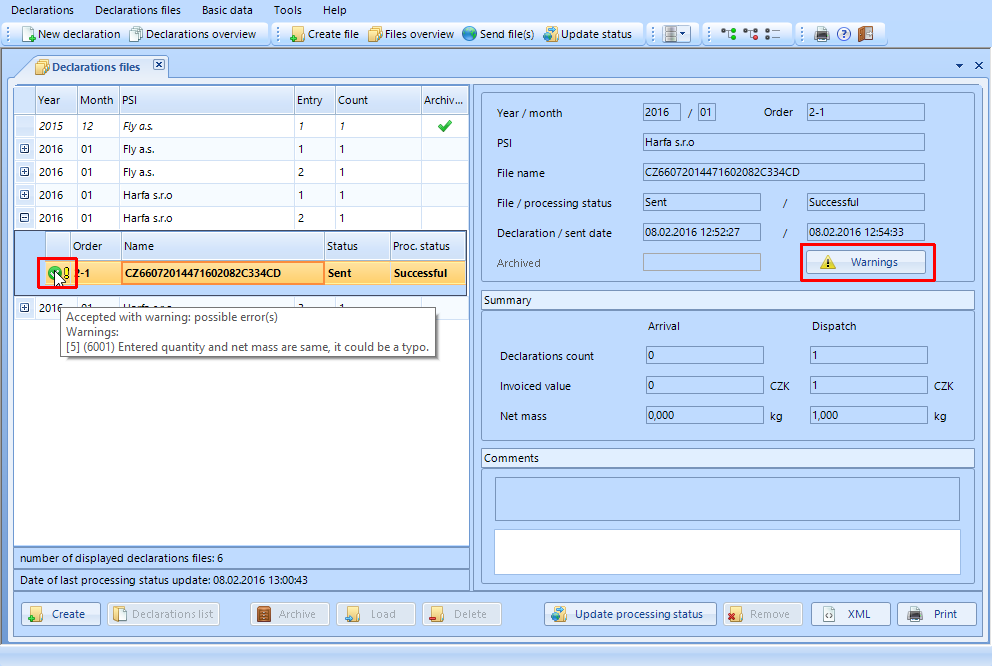
Warning about a possible error in the declarations files overview
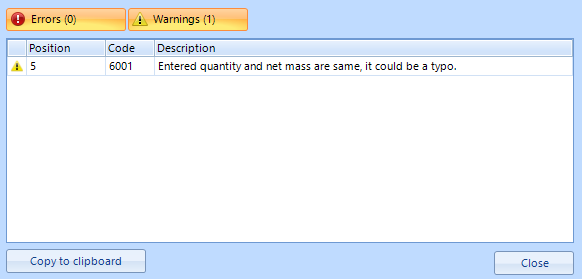
Warning about a possible error after clicking on the button
Example
In the specific case on the picture the warning says that the entered net mass and quantity in supplementary unit is the same so it could be a typo. A PSI exported 100 litres of wine which has the same net mass (100 kg) as the quantity in supplementary unit (LTR) but it is quite possible so if it is OK you do not have to do anything. There is the warning in this case because it is (and was) often a typo.
A warning appears in the declarations overview in the particular line which has the warning.
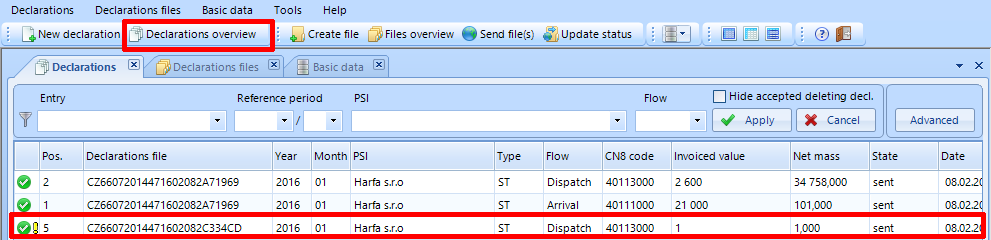
Viewing warnings in the declaration overview
6. MENU "Basic data"
Selecting the option from the main menu

A quick toolbar option
6.1 Introductory note
This chapter presents the submenu "Basic data". Basic data - are data that contain information about the PSI units and the TDP (third declaring party) - sender. Information about the PSI and the sender (TDP) must always be filled out before making any declarations. These data are used for every file you are sending.
Basic data are also auxiliary data about goods (templates) you frequently deal with and currency rates. These data can be used later and simplify filling out of declarations.
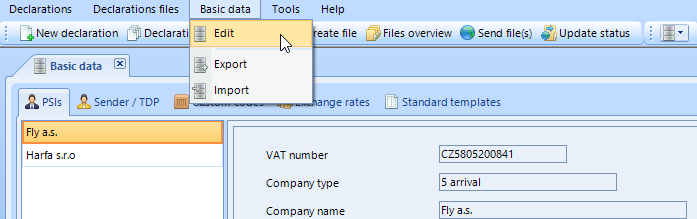
6.2 Submenu "Edit"
You can enter the submenu through "Basic data ? Edit".
This opens the window with five tabs:
PSIs (provider(s) of statistical information) (mandatory)
Sender/ TDP (third declaring party) (mandatory)
Custom codes (custom-made codes - your own)
Exchange rates
Standard templates
Individual tabs are explained in the following paragraphs.
6.2.1 The tab "Sender / TDP"
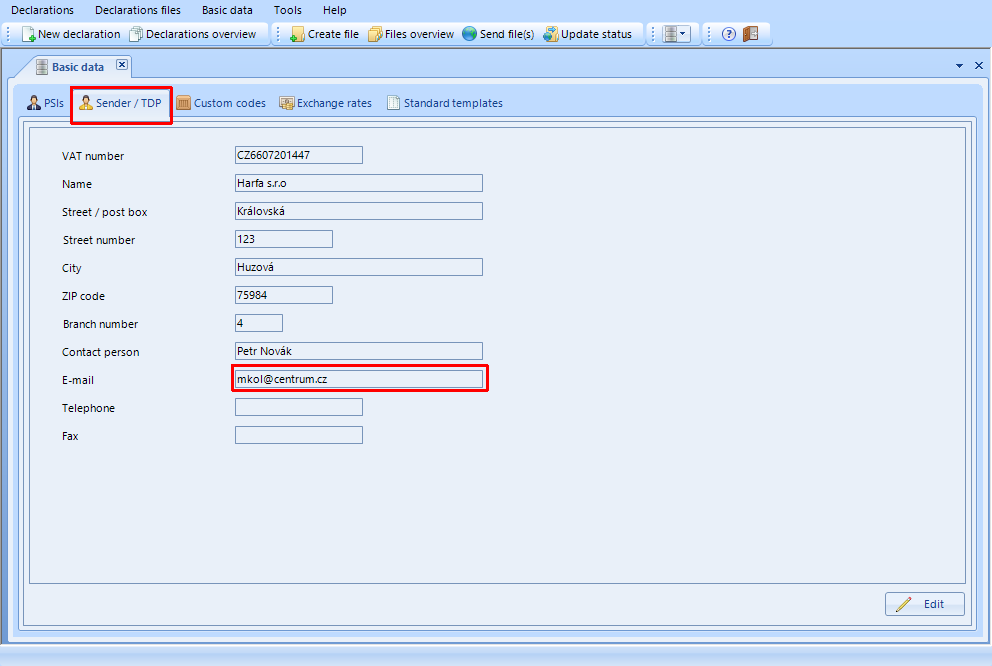
The tab "Sender / TDP" (third declaring party)
On this tab (card) you have to enter information about sender / TDP that sends files to the data centre. The entered data must comply with registration data which were provided for registration at the Customs Office. If the PSI sends declarations for himself the PSI is also sender (TDP) and has to fill this card.
If you want to change the data already saved about the sender / TDP you have to use the "Edit" button.
The legend to the tab Sender/TDP
VAT number
VAT number of legal or natural person
Name
The company name of the sender / TDP registered for submitting declarations.
Street / Post box
Enter the street name or post office box for sender / TDP.
City
Enter the city or village where is the residence of the sender / TDP.
ZIP code
Enter the ZIP code of your city.
Branch number
Data files for a single VAT number (PSI) can be sent from multiple workstations (PCs) (or better said from multiple instances of the application InstatDesk-CZ). In case you have more branches of a company or more persons have to send the declarations from their own installations of the InstatDesk you have to set the different branch for every instance of the program. (The application is made for one user only). The purpose of the branch number is to distinguish these instances within the company (VAT number) - it means each sender with the same VAT number of the PSI must have a unique branch number. (In our Intrastat system the unique identifier of the record (declaration) is the combination of VAT number + branch number + reference period(YYYY-MM) + position in the given month (reference period).
Attention - Changing the branch number at the time when the files are already sent will cause the deletion of all declarations and declarations files (after confirmation by the user)!
Contact person
Enter the name of the responsible person for sending data.
Enter the email address. Email address is used as your login name to our Intrastat system (even to our portal of the Czech Customs Administration). Entering an incorrect email address may lead to problems with sending.
Telephone
Enter your telephone number.
Fax
Enter your fax number.
6.2.2 The tab "PSIs" (provider(s) of statistical information)
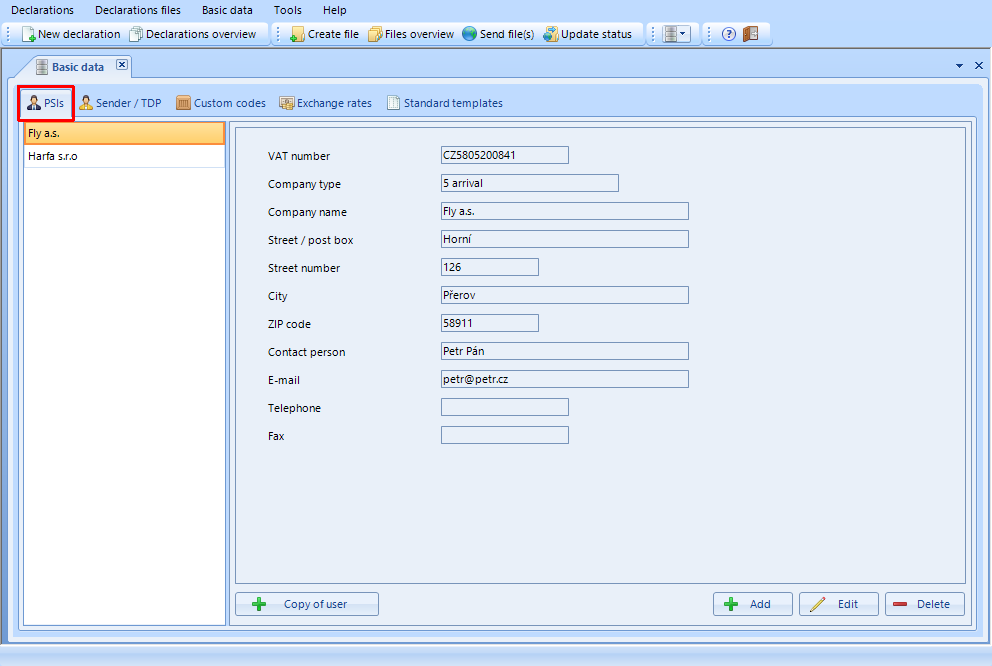
The tab PSIs (provider(s) of statistical information)
On this tab (card) you have to enter information about the PSI (reporting company) that has the obligation to send data about the trade to Intrastat data centre. The entered data must comply with registration data which were provided for registration at the Customs Office. If the PSI sends declarations for himself the PSI is also sender (TDP) and has to fill even the card "Sender/TDP" but you can use the button "Copy of user" to copy the sender data to the current PSI fields. It is possible to add as many PSIs as you need but of course you should have the right to represent them. For adding the PSI press "Add". Existing items can be changed after clicking on the "Edit" button. PSI units may be deleted from the list after using the "Delete" button.
Explanatory notes to the tab: PSIs
The list of PSIs
The list shows the names of PSIs saved in the DB of the application.
VAT number
VAT number of legal or natural person
Company type
Company type according to the declaration flow:
1 - arrivals and dispatches
5 - arrivals
7 - dispatches
Company name
The company name of the PSI registered for submitting declarations.
Street / Post box
Enter the street name or post office box for the PSI.
City
Enter the city or village where is the residence of the PSI.
ZIP code
Enter the ZIP code of the PSI city.
Contact person
Enter the name of the responsible person for the PSI data.
Enter the email address of the PSI. This email address is only for contact reasons. It is not the login name!
Telephone
Enter a telephone number.
Fax
Enter a fax number.
6.2.3 The tab "Custom codes"

The tab "Custom code"
In this card you can save your own codes and the names for frequently reported types of goods. To add a new commodity click the "Add" button. Existing data can be changed by pressing the "Edit" button. The entries can be removed from the list of commodities by the - "Delete" button.
New records and changes of records are done by the Add / Edit buttons. The operation is confirmed by pressing the "Save" button.
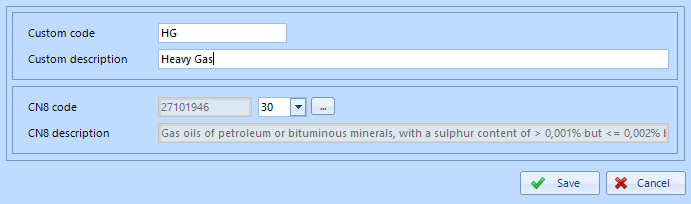
The dialog "Add" - Custom code
Explanatory notes to the tab: Custom codes
List of codes
The list of goods that have already been assigned your own codes.
Custom code
To this field you can enter your own product code. It can be used for easier filling out of declarations (see the description of the input field "Custom Code" form "Intrastat declaration"). This item is not recorded to the declarations file which is sent to the Intrastat data centre it is only your auxiliary code. Custom commodity code can be defined directly from the current declaration form. After filling out of the CN8 code of goods the button "Assign custom code" is made available where after clicking on the button you can enter in the dialog window your own custom product code. This will be assigned to just entered CN8 code. Furthermore you can see your own custom codes in the menu for CN8 code searching on the second option card.
Custom description
To this field you can enter your own description of goods. This description is displayed in card "Custom codes" in "List of codes".
CN8 code
It displays the selected CN8 goods code (8-digit combined nomenclature - tariff classification) which identifies products for "Foreign trade statistics".
Statistical sign (additional goods code)
It is accessible only for some CN8 codes (for oil and spirit products). When the selected CN8 code needs the additional goods code (statistical sign) then this field is available (active) and you have to select the right code from the combo box.
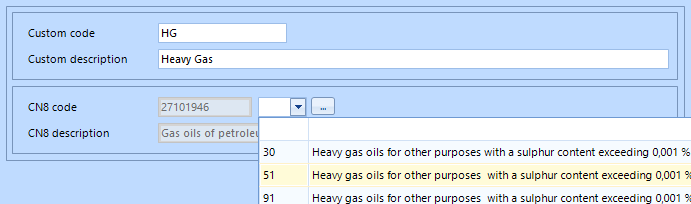
Selecting the statistical sign (additional goods code)
CN8 description
It displays the usual description of selected goods code CN8 code.
The utility button ("...") for CN8
By pressing the button you enter to the "CN8 codes" table. In this utility window you can see all CN8 codes, supplementary units and descriptions. By entering the CN8 code or at least first digits you can find the code beginning by that digits then you can select it for your own "custom codes" list of goods. You can also search by using the description field but it is often not so useful. Do not forget on choosing the right year for because every year there are changes in CN8 codes.
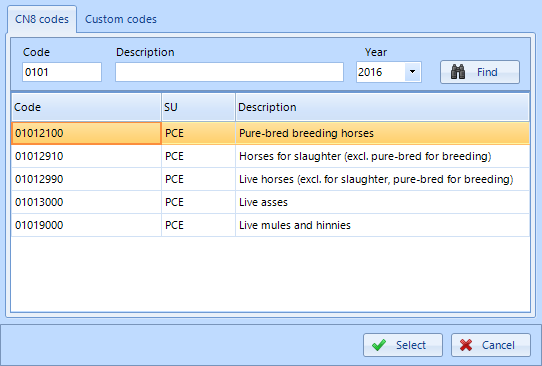
Searching and selecting the correct CN8 code
6.2.4 The tab "Exchange rates"
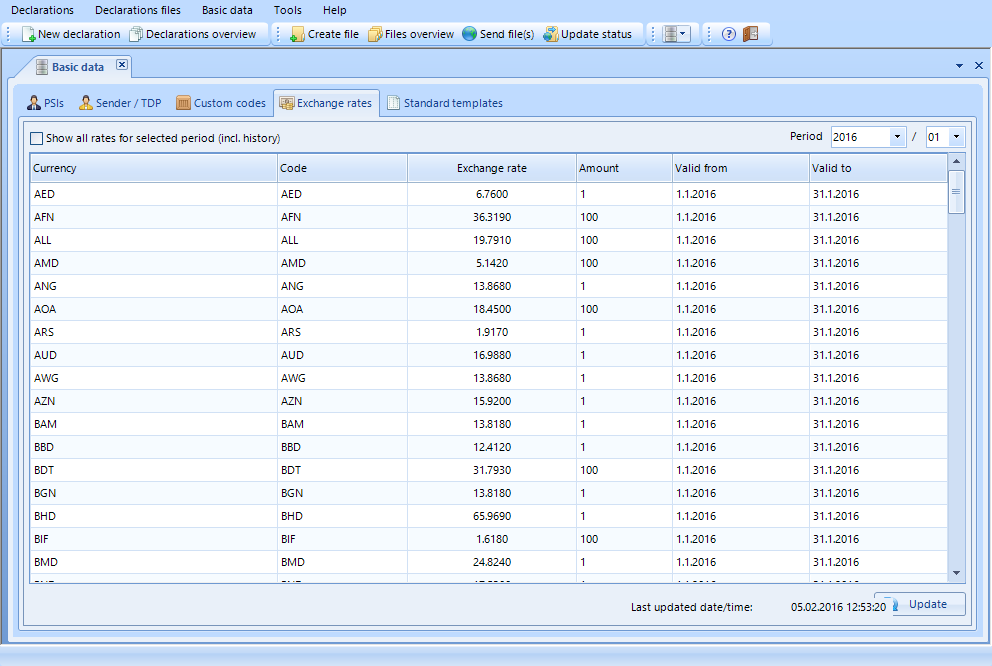
The tab "Exchange rates"
This tab displays the exchange rates (for customs duty) for the selected period. These can be used to enter the value of the invoiced amount to the declaration.
Exchange rates can be updated from the server by using the "Update" button.
Explanatory notes to the tab: * Exchange rates*
Currency
This column shows the name (code) of the currency.
Code
This column shows the code for the name of the currency
Exchange rate
This column shows the exchange rate of the CZK (Czech crown) to the foreign currency.
Amount
This column shows the amount of the foreign currency to the CZK.
Valid from / Valid to
These columns show the time period for which the rate is valid.
6.2.5 The tab "Standard Templates"
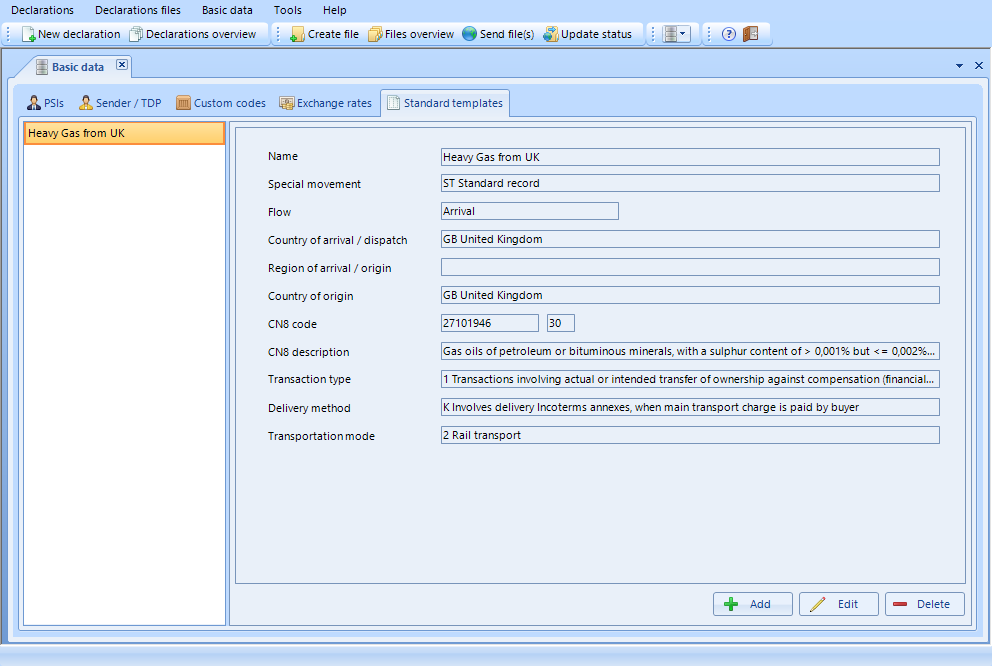
The tab "Standard Templates"
In this card (tab) can be defined and saved your frequently used goods declarations. Almost all important items can be pre-filled. The template can be used in the declaration form by pressing the "Template" button. After that you have to fill out only empty items. Of course you can change any item which was loaded to the form.
A template is not linked and validated to the reference period so it may happen that the previously saved template contains data that is no longer valid for the actual period (does not match the actual codes for the reference period).
Templates can be added by using the "Add" button. The already saved templates can be changed by the "Edit" button. Removing is done by the "Delete" button.
Explanations to the tab *"Standard templates"*
The list of standard templates
The list displays the stored templates with your naming. Individual items of the selected template are displayed in the fields.
Name - your own chosen template name
This field displays the specified template name and when you enter a new template it must be filled. You can name a template as you wish it is for your convenience. The template name appears in the dialogue form in the selection list when you enter items in the form "Declaration" after pressing the buttons "Template" ? "Select".
Meaning of individual input fields on a template
Meaning of the fields is the same as in the Intrastat "Declaration" form. See the relevant chapter.
6.3 Basic data submenu "Export"
To this submenu you go through the main menu "Basic data ? Export". All existing items in the "Basic data" are exported, i.e. backed up in an archive file. Backed up data can then be imported back to the program.
After clicking on the "Export" the "Save As" dialogue appears for selecting the path and name of the archive file. After entering the file name and the confirmation the data will be backed up and at the end of the process a message will appear about the successful export.
Archiving of the "Basic data"
Export of the "Basic data" ie. "Basic data" backup is recommended after entering the basic data or after major changes in the basic data.
The basic data are saved as an XML file for the InstatDesk-CZ application in the selected directory.
The basic data can be loaded back into the program via the menu option "Basic data = > Import".
When you change your PC the InstatDesk-CZ application can be installed on another computer and the backed up basic data may be imported to the new installed application.
6.4 Basic data submenu "Import"
You can enter this menu through "Basic data ? Import". The selection window "Select backup file of basic data" opens and you can choose the basic data export file you backed up before. Click on the "Open" button to transfer the selected "Basic data" export file back into the program.
Caution: The import will take only the items from the basic data which are missing in your application DB, existing items still remain.
Selecting an archived file of basic data
You will be informed about the successful import of basic data.
Information about the successful import of basic data
Recommendation: You can backup your actual basic date before importing the archived basic data. (See the previous section 6.3)
7. MENU "Tools"
7.1 Introductory note
This menu contains utility functions and settings.
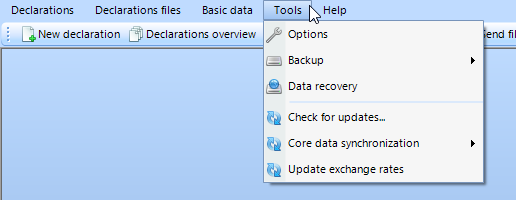
Tools
7.2 "Submenu "Options"
7.2.1 Card "General"
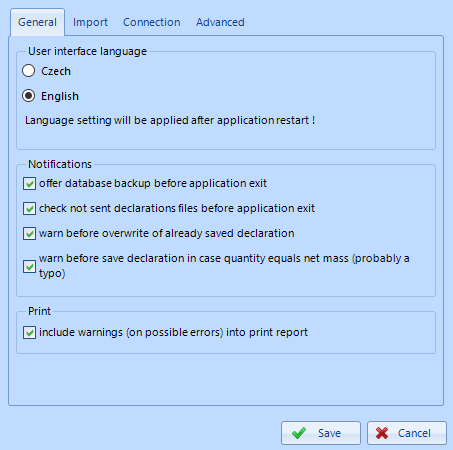
Card "General"
This card includes the following settings:
- User interface language
You can choose from Czech or English language. To apply the language change the restart of the application is needed.
-
Notifications
- "Offer database backup before application exit" - the application will automatically back up your DB before exiting (with the automatically generated file number). By disabling this option you will not notified before exiting.
- "Check not sent declarations files before application exit" - this check is done for preventing not sending an already created file.
- "Warn before overwriting of an already saved declaration" - when saving the declaration you are notified of overwriting a previously stored declaration (you do not create a new one).
- "Warn before saving a declaration in case the quantity equals the net mass (probably a typo)"
-
"Include warning (on possible errors) into a print report" - in the print report will be the error notification:
The print report with the error notification
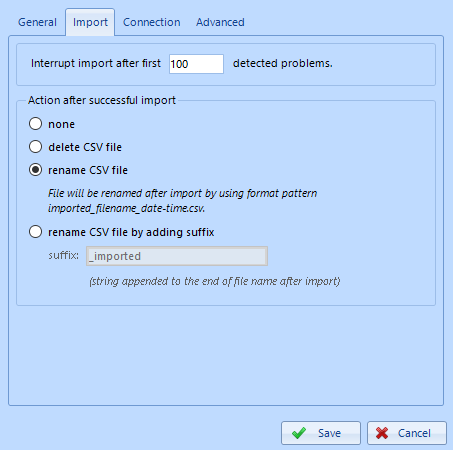
7.2.2 Card "Import"
On this tab you can set properties for importing from the CSV file.
Card "Import"
-
Interrupt import after x detected problems. - if the imported file contains many errors it usually does not make sense to import it because manual corrections could be difficult and the problem needs to be solved in the primary system.
-
"Action after successful import" - to avoid unwanted repetitive import of a file and thus the creation of duplicate records the program offers to rename or delete the file after a successful import. The file can be renamed according to the proposed template or by adding your own extension.
7.2.3 Card "Connection"
This tab allows you to configure your network connection parameters.
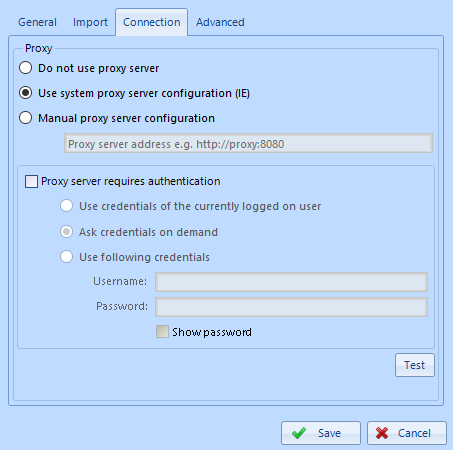
Card "Connection"
In the event of problems with data transmission and receiving connection error messages go to this tab and press the "Test" button. You must see the message "Connection successful". If an error message appears contact your IT administrator because there are problems while connecting to our servers. Try to change your settings or show this possibility to your IT expert.
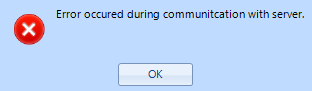
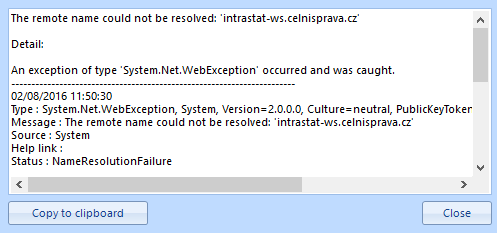
The error message during sending of data
The communication error after pressing the "Test" button
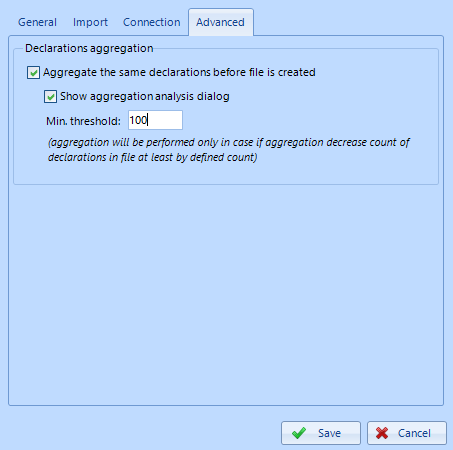
7.2.4 Card "Advanced"
This tab allows you to set whether and under what conditions the aggregation will be done or if you want to display detailed information about aggregation. It the threshold value is set to 100 the aggregation takes place only if it saves at least 100 sentences. If you set the value to 1 the aggregation is always performed. The aggregation is useful when you import large CSV files.
Data aggregation
Aggregation is done in the context of sending the file (as described in paragraph 5.8.1).
-
What is aggregation? Aggregation is a merger of the almost same records with the only different items - (the quantity in supplementary unit, the net mass and the invoiced value - these values are summed).
-
Why aggregate? If you have a lot of records you can significantly reduce the file size and speed up the processing of files in the server queue and your InstatDesk application DB will have a better performance. Further you can easily see the 5% threshold for corrections.
-
Example
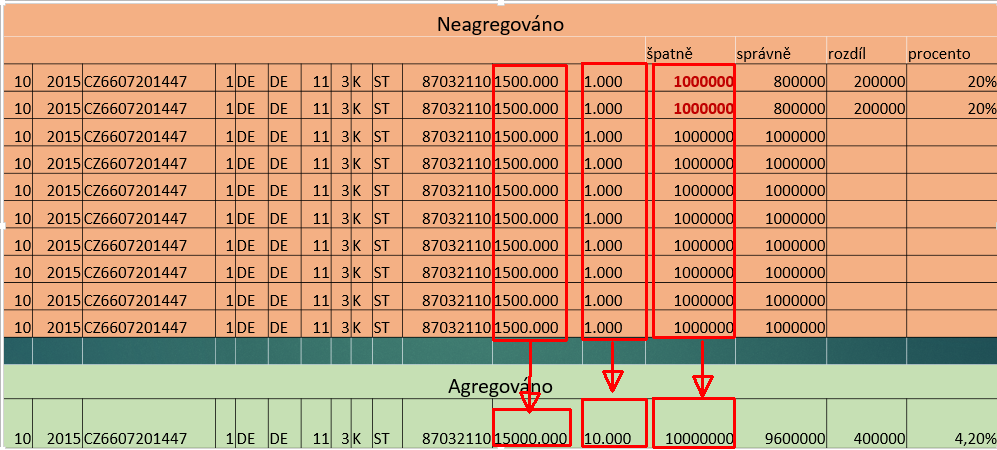
Aggregation example
The picture shows 10 non-aggregated same lines. After aggregation you can see one row with summarized net mass, quantity in supplementary unit and invoiced value. In the first two rows there is the difference 20% from the correct value. After aggregation the difference is only 4.2% thus fits into the permitted tolerance you do not have to make correction which is not true for non-aggregated data.
7.3 Submenu "Backup"
Submenu "Backup" is used to save and restore data (the whole DB). There are further submenus "Back up" and "Restore from a backup".
Submenu "Backup"
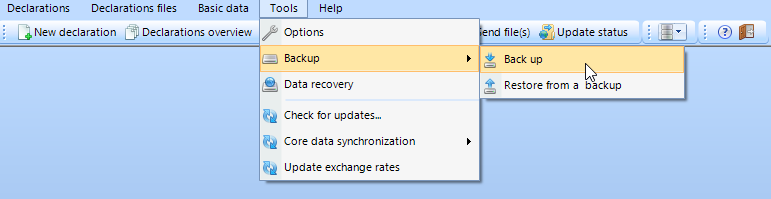
7.3.1 Submenu "Back up"
Through the submenu "Backup ? Back up" a user can save the entire database to a file in a directory for backups (\ [application directory ] \ BackupData). The name of the backup file is based on the backup time and has the format "InstatDesk \ _RRRRMMDDhhmmss.idd" (eg. InstatDesk \ _20110124224907.idd). The success the backup is confirmed by the information dialogue.

The backup of the DB
We recommend to place a backup to other media too.
7.3.2 Submenu "Restore from a backup"
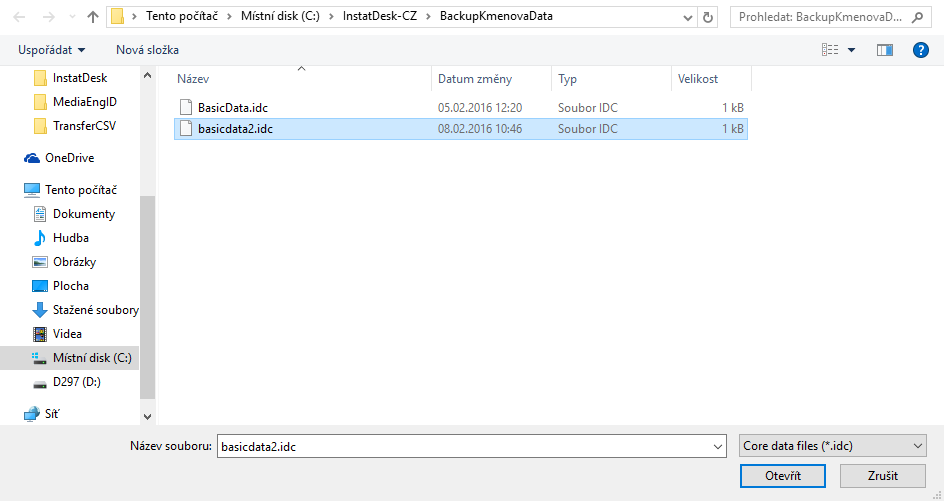
Through the submenu "Backup ? Restore from a backup" a user can restore the previously backed up data. When you click on the submenu the window opens to select the backup file.
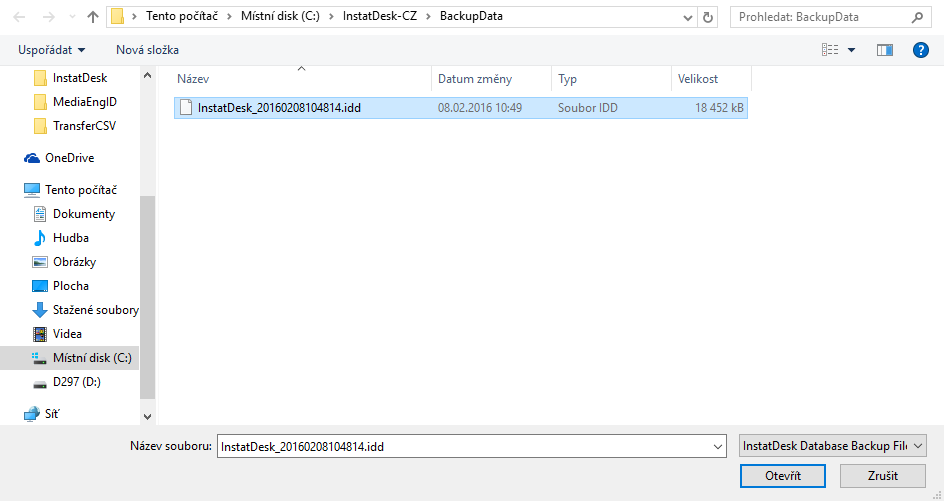
Selecting the backup file
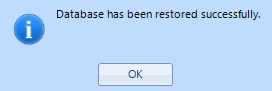
After selecting the saved file (eg. "InstatDesk \ _20160208104814.idd") the restore of the database is executed (in this example the backup time of the file is: February 8, 2016 10:48:14 a.m.). The success of the restore is confirmed by the information dialogue.
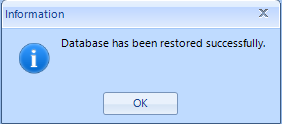
Information about the success of restoring from the backup
Important note: Attention! All current data are overwritten!
7.4 Submenu "Data recovery"
This function is used to restore declarations after their irreversible loss (eg. hardware damage, unwanted deletion of the application and the current absence of the actual backup file). You can restore only declarations created by InstatDesk-CZ applications which have been sent for processing (to our Intrastat server). To restore declarations you have to contact the Intrastat helpdesk and ask for a data recovery from our server. The helpdesk staff will inform you about the next steps. You will receive a data package for the given reference period. (The data for the given reference period will be overwritten.)
7.5 Submenu "Core data synchronization" (Online - from server)
"The core data" means Intrastat codes. Synchronization of codes is used to update the actual valid codes for your InstatDesk application (eg. CN8 goods codes, statistical sign codes...). Without actual codes it is not recommended to enter the actual declarations.
Important
Synchronization of codes should be done at least before sending the data for January because the Intrastat codes are usually changed once in a year. But take it easy when you send the data file you will receive the message about the new codes.
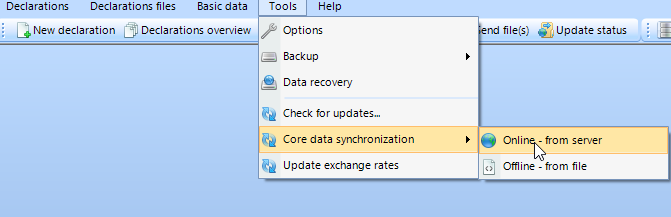
Submenu "Core data synchronization" (Online - from server)
8. MENU "Help"
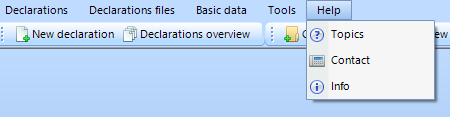
Menu "Help"
8.1 Introductory note
This chapter discusses all "Help" sub-menus in the InstatDesk-CZ program. In the submenus you can find additional information about the application.
8.2 Submenu "Topics"
You enter the submenu through the menu item "Help ? Topics". Individual topics are displayed and you can select them with the mouse.
8.3 Submenu "Contact"
You enter the submenu through the menu "Help ? Contact". There is the very important information window about the Intrastat helpdesk.

Contact
8.4 Submenu "Info"
To this submenu option you can get through the menu "Help ? Info". There is information window about the installed version of the application InstatDesk-CZ and the link to the Intrastat web pages of the Czech Customs Administration...
Application information